Display a special message with this Valentine wood tag banner. It’s easy to make and you can add any message you want.

A few month ago I was at Dollar Tree and was looking at some of their holiday decor. I came upon some Christmas signs where the main embellishment was a string of small wooden tags that spelled out various Christmas-y messages. It was so darn cute, but also looked like something I could make on my own.
With it now being February, this year’s Christmas is quite a ways away. But with Valentine’s Day right around the corner, I knew I could make something to suit the holiday.
So I came up with this adorable Valentine Wood Tag Banner. And I’m so happy with how it turned out.
I usually use cotton yarn to string my banners and garlands together, like on my felt flag banner or my pom pom garland. But this time I went with twine to complement the wood beads. I think it worked so well to tie everything together.
This banner would look great hanging on a wall, off a shelf, or across the mantel of a fireplace alongside all your other Valentine decorations. It’s also completely customizable, so you can choose whatever message and colors you like to make it unique!

What You Need to Make a Valentine Wood Tag Banner
Note: This post may contain affiliate links, which means that if you click on a link and make a purchase, I may earn a small commission at no extra cost to you. For more information, please see my Disclosure.
Start by grabbing your materials. Here’s what you will need:

You will also need something to hold your beads while they dry. I use a block of scrap wood with holes drilled into it. But you can use anything as long as it keeps the beads from touching the table.
Figuring Out How Many Beads to Use
The number of wood beads that you will need for this banner is mostly going to depend on how long you want your finished banner to be. You will also need to consider what the message on the banner will be and how much spacing you want between each letter and word.
My beads are 25mm (or about 1 inch) wide. I also wanted the banner to be around 4 or 5 feet long. So I knew that I would need to use at least 48 beads to get the length that I wanted.
So I did some trial and error before I figured out what spacing I liked. I decided on 2 beads between each letter and 5 beads between each word.
I also wanted the number of total beads to be divisible by 3. That way I would have an equal number of each color bead.
Just to give myself enough room on each end of the banner I put 9 beads on either side. This made the banner the length I wanted while still keeping the total divisible by three.
So if you wanted to make your banner exactly like mine, you would need 48 beads in total. That makes it 16 of each color.
Other Messages to Use on Your Valentine Wood Tag Banner
I chose the phrase “Be My Valentine” because I thought it would look good on a longer banner. But you could go with whatever word or phrase you want.
Here are some other Valentine themed messages you could use:
- Happy Valentines Day
- Be Mine
- This is Love
- I Love You
- Roses are Red
- Kisses & Hugs
- True Love
That’s just a few examples, but the possibilities are endless! So choose whatever is best for your project.

How to Make a Valentine Wood Tag Banner
Step 1: Add Beads to Skewers
Before your beads can be painted, they need to be put on the skewers. This will allow you to paint the entire bead and also keep them from touching anything while they dry.
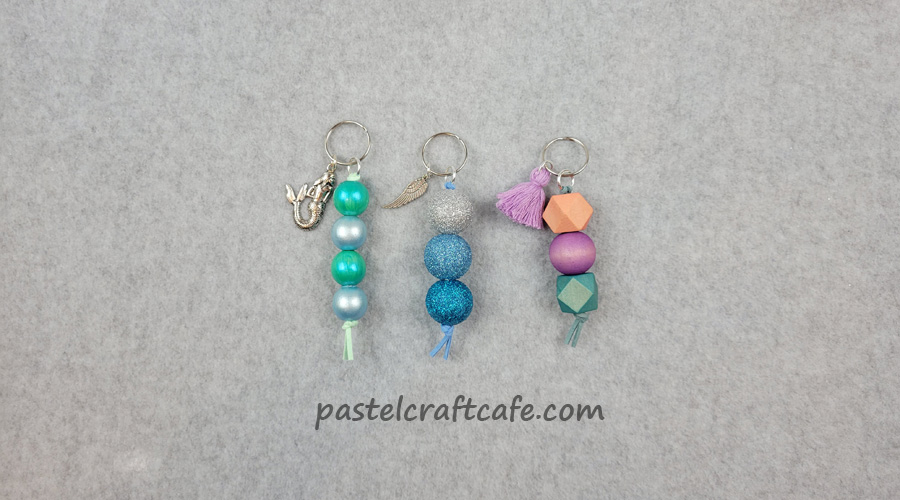
If you are using apple skewers like mine, the tips will likely be very sharp. I highly suggest snipping off the tips with scissors before you add your beads. I accidentally stabbed myself in the hand while working on my wood bead keychains, so I know from experience. Trust me, it’s something that’s best avoided.
Once the skewers are ready, you can place the bead on the end. You will want them to fit well enough that they won’t slide down the skewer when you paint.
If the holes on the beads are big enough that they are sliding down the skewer, it’s an easy fix. Just add a bit of hot glue not quite halfway down the skewer.

Step 2: Paint Beads
It doesn’t really matter what you paint first, but I decided to start with the beads. I’m also using 3 different colors: white, red, and pink.
Paint a thin coat onto each bead and let the paint dry completely before adding another coat. Usually that will take about 10 to 20 minutes.

One coat of paint likely won’t be enough. So just keep adding thin coats of paint until you’re satisfied with the coverage.

The paints I’m using here needed three coats each, but every paint is different. I’ve had paints that only needed two coats and others that needed more than five.
If you have more beads than skewers, don’t take the beads off quite yet to start the next batch. I find it’s better to completely finish them before moving on.
Step 3: Varnish Beads
When the paint on your beads has completely dried, they can be varnished. This will give the beads a nice looking finish and will prevent the paint from chipping.
I chose a matte varnish for mine. The one I use gives it a very, very subtle shine that I think looks the best with these solid color beads.
Applying the varnish is just like the paint. Paint on a very thin coat, then allow it to completely dry.

With this varnish, two coats is perfect. I like to let it dry for a little extra time after this to really make sure nothing will smudge.
I usually leave mine overnight. But a few hours should be plenty if you don’t want to wait that long.

If you still have more beads to paint, you can remove the finished ones from the skewers now. Then start again at Step 2 with a new batch.
When removing the finished beads, they will likely be stuck to the skewers. Just keep carefully pulling and twisting the bead until it comes loose.
Repeat Steps 2 and 3 until all your beads have been painted.

Step 4: Paint Tags
With the beads done, let’s move on to the tags. I’ve picked out a bit of a darker pink color for these. Then I started by painting the back side of each tag.
When the banner is displayed, only the front side of the tags will be visible. However, I like to put at least one coat on the back so everything will look more finished.
When the backs of the tags are dry, flip them over and paint the front.
Step 5: Write Message on Wood Tags
Now you can add your Valentine message to the tags. For this I’m just using a standard oil-based paint pen. When using these pens I suggest testing it out on a scrap piece of wood or cardboard to make sure the paint is flowing correctly. Then write each letter of your message onto the tags.

After that, put them off to the side to dry.

I felt like this was a quick and inexpensive way to add my message to the tags, and the handwritten letters gave it a more personal touch. But if that’s not your style, there are other ways you can add your message too.
Other Ways to Add Letters to the Tags
For one reason or another, you may not want to use a paint pen like I did to add the letters to the wood tags. So I came up with a few alternatives. Each of them has their own positives and negatives.
Paint and Brush
If you’re much more confident in your painting skills, you can use a paint and brush. There are so many different types of both paints and brushes that you can customize your letters (or anything else you wanted to put on the wood tags) to your hearts content.
Cutting Machine
Using a machine like the Cricut or Silhouette is a great option if you aren’t confident in your handwriting, or just want a very specific font. But unless you already have one of these machines, it might be too expensive of an option.
Stickers
Alphabet stickers are another great option if you don’t want to write the letters yourself but don’t have a cutting machine. Most craft stores have a decent selection, but you are still limited to the sizes, fonts, and colors of the stickers they have on hand.
Step 5: Varnish Wood Tags
After all the letters have been added to your tags, add a layer or two of varnish. Just like with the beads, it will protect the paint while giving it a subtle shine.
I only painted varnish on the front side of my tags, but if you want to be a bit more thorough you can do both sides.

Like with the beads, after adding the varnish, leave the tags until they are all completely dry.
Step 6: Add Loops to Wood Tags
On their own, the tags would hang sideways when strung onto the cord. So in order for the tags to hang properly on the banner, they will need loops.
Measure out a small piece of the twine. I like mine to be longer so the knot will the easier to tie, so I cut mine about 12 inches long.

Then thread it through the hole in the tag and tie a small loop. After that, trim off any excess twine.
You’ll want your loop to be big enough that the tags can hang below the beads, but not so big that they can easily slide around the beads and get out of place. Just keep that in mind as you are tying your knots.

Then repeat that for all the tags. Try your best to make the loops the same size so the tags hang evenly.

Step 7: String Everything Together
Now it’s time to string everything onto the banner. Start by tying a small loop at the end of your twine.
Then measure out about how much twine you’ll need for the banner. Make sure to measure out a little extra to account for the loop that will be tied on the other end too. Then cut.
One by one string on your beads and tags onto the twine. I find the easiest way to do this is to fold the end of the twine first.

This way the twine slides easily through the beads.

I found that if you try to string it on the end without folding it, the twine frays and it becomes harder to get the next beads on. And when I had 48 beads on this banner, that wouldn’t have worked.
Continue stringing on the beads and tags. Make sure to pay attention to any color patterns and spacing between the tags as you go.


When all the beads and tags have been added to the twine, tie another loop at the other end and cut off any excess twine.

Step 8: Hang Valentine Wood Tag Banner
With the banner finished, the only thing left to do is hang it up!

I hung the loops onto a couple of thumbtacks to put mine on the wall. But you can use any other method you like to display it.
Final Thoughts on My Valentine Wood Tag Banner
Besides a slight investment of time, mostly to paint all the beads and tags, this Valentine wood tag banner is a very easy and fun project.
I especially love how easily customizable it is. You could make a banner for any holiday, party, season, etc.
The only problem I’ve noticed is that the knots on the end of the banner are small enough that the beads can slide over them. So it’s possible for some beads to slide off if either end is hanging downward.
Luckily, the twine provides enough friction that only a few beads ended up falling off anytime I accidentally dropped one of the ends. But it would still be better if it didn’t happen at all.
I think the best solution would be to add a smaller bead on each end of the banner while everything is being strung together. So that is likely what I’ll do if I make any similar banners like this in the future.
I hope that you enjoyed this tutorial and found it helpful. If you have any questions or comments, please feel free to leave them below. I’d love to hear from you! Thank you for stopping by and happy crafting!

If you liked this tutorial, don’t forget to pin it for later on Pinterest!

Try These Projects Next!