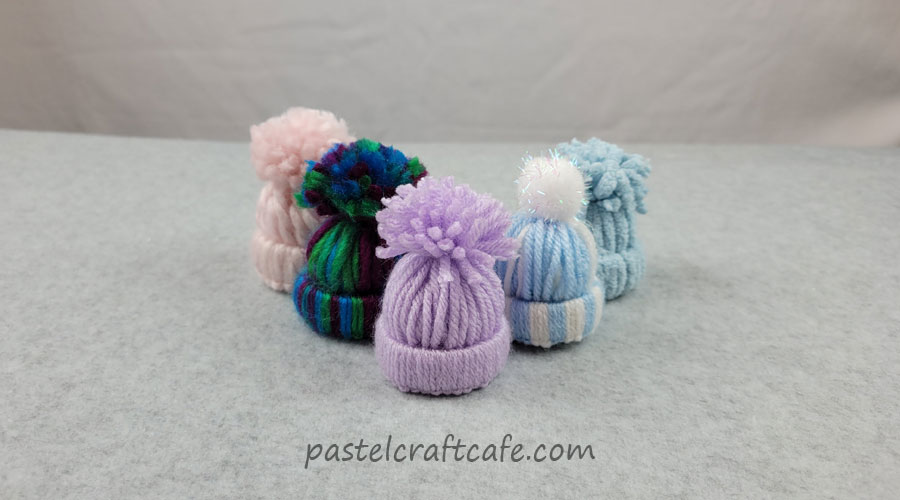
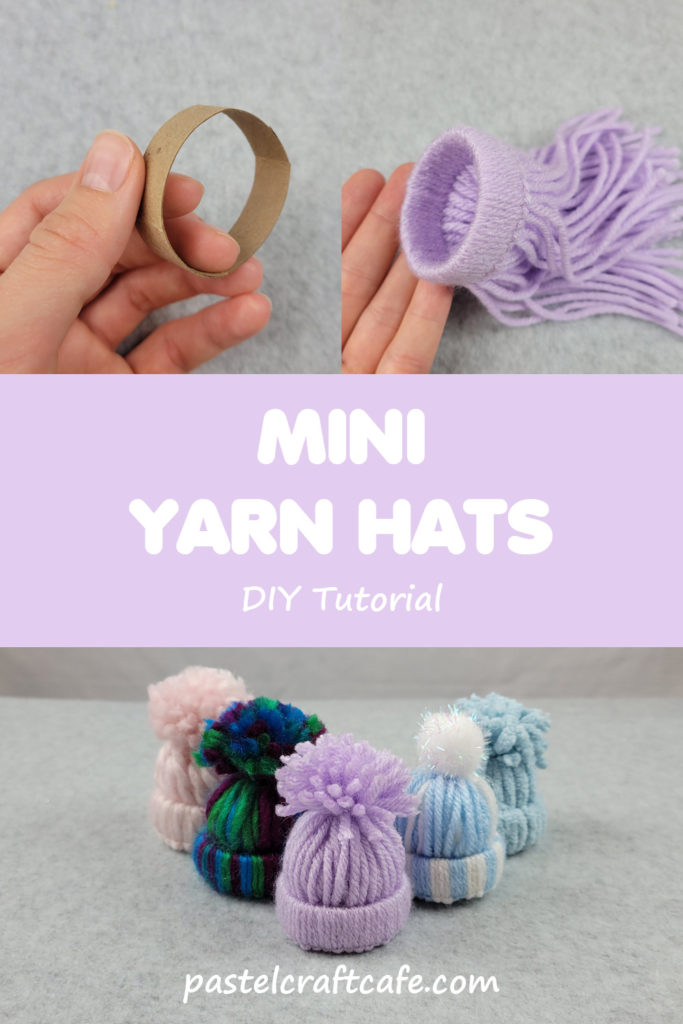
These adorable mini yarn hats are made from just a few materials and make the perfect accent for all kinds of wintery crafts. Choose your favorite yarn and pom poms to create a style fit just for you.

Well it’s December again. And that means I need to start working on Christmas decorations.
I’m sure there are plenty of you who start on their Christmas crafting way in advance, but not me. Not that I mean to procrastinate, but it always seems like by the time I get around to thinking, “Hey, I should probably start on those Christmas decorations” November has already come and gone.
Anyway, this year I wanted to try making the cute little yarn hats that I’ve been seeing all over Pinterest. It seemed fun and simple, plus I had all the materials to make them on hand.
I’m still on a quest to use up a bunch of toilet paper tubes that I’ve collected, so I’m looking for any kind of crafts to make use of them. So far I’ve only used them as a pom pom maker. But now I can add these mini yarn hats to the list too.
When I got started making these hats, there was just one little thing I wanted to change: the size. Using the toilet paper tubes can be great if you like the standard size and want to keep things uniform. But I’m the type of person who really likes to customize everything I can when I craft. So I played around a bit to find some methods to make these hats in both bigger and smaller sizes.
The step by step portion of this tutorial will be going over how to make the standard mini yarn hat using a toilet paper tube. Then I’ll show you how to do some variations to alter the size.

What Can You Make with Mini Yarn Hats
As far as what you can make with these fun little hats, the sky’s the limit! They can be added as an embellishment to all kinds of projects. Or they can be a decoration all by themselves.
If you’re looking for some inspiration, here’s a few I ideas on how you can use your mini yarn hats:
– String them together to make a garland
– Add a loop at the top to make an ornament
– Embellish a winter themed wreath
– Smaller hats can be used in miniature scenes
– Larger hats can be made to fit dolls
The type of project will determine what size hat you would use. You can make them about as big or as small as you want, but just to give an idea, here’s the three different sizes of yarn hats that I made:

As you can see there’s quite a bit of variation that you can do. And of course you can make any size in between too.
What You Will Need to Make Mini Yarn Hats
Note: This post may contain affiliate links, which means that if you click on a link and make a purchase, I may earn a small commission at no extra cost to you. For more information, please see my Disclosure.
Yarn
Toilet paper roll
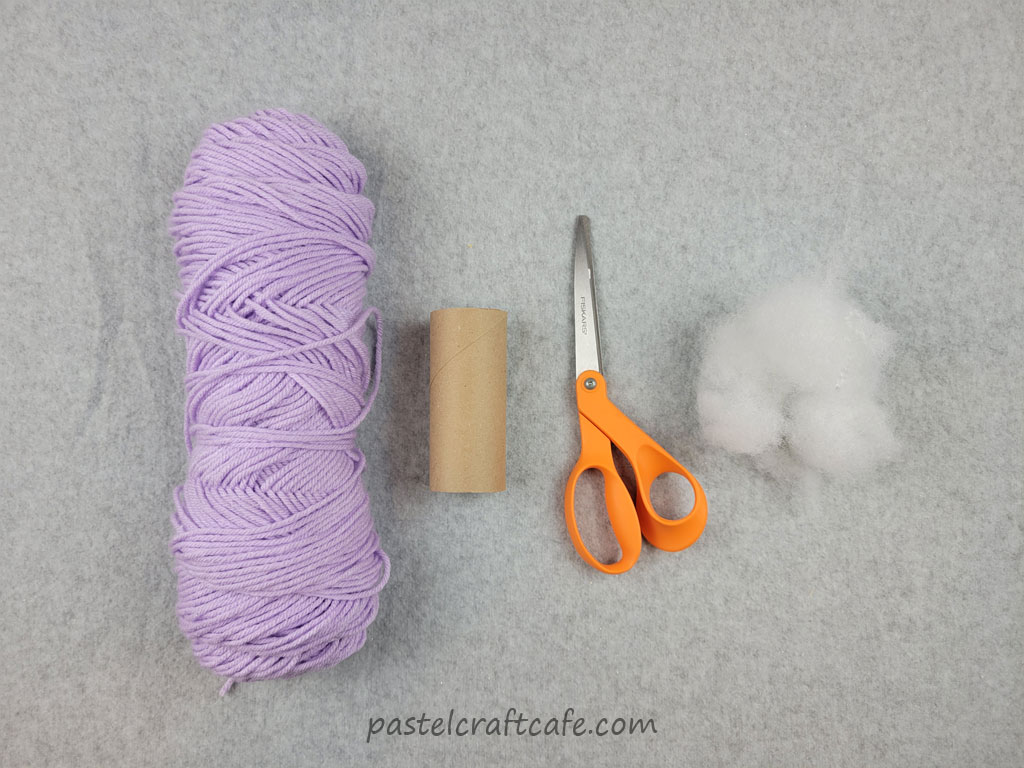
I also used a ruler and pencil to mark how wide I wanted my hats before cutting the toilet paper tube. But if you’re good at eyeballing measurements or don’t need them to be perfectly uniform feel free to skip that part.
It also helps to have something to measure your yarn pieces with. You can always use a ruler, but it would be a bit tedious to measure out each individual strand. To keep them the same size I wrapped the yarn around my phone, but a small book would work too.

How to Make Mini Yarn Hats
Step 1: Cut Toilet Paper Tube
To start, cut a small ring off the toilet paper tube. This will become the brim of the hat.
I used a ruler and pencil to mark my toilet paper tube before cutting. This helped me to keep everything exactly the same size.

The width you want the brim to be is up to you. I found that I liked them best when I cut the ring to be 1/2 in wide. But that’s just my personal preference.
Here’s one of them after I cut up the tube. As you can see, it’s pretty thin.

For my first attempt at making these hats, I went with a brim that was a bit larger. I think it was a bit wider than 3/4 inch. That one is on the left and the 1/2 inch brim is on the right so you can see the difference.
It isn’t much but it does change the look a little bit. But that’s just another way you can customize these little hats.
Step 2: Cut Yarn Pieces
Now you can cut your yarn that will make up the rest of the hat. I’m using a medium weight acrylic yarn. You can use just about any type you want, though. The thicker the yarn, the less pieces you will need.
For the standard mini yarn hat, your yarn pieces will need to be about 11 to 12 inches long. I wound my yarn around my phone, which gave me perfect pieces about 11 inches long.

After winding my yarn I slid the bundle of my phone and cut one end. This gives me my strands.

Using my yarn, I needed about 40 or so strands in total for my hat. Depending on your yarn and how close you line them up on the brim you might need more or less.
If you don’t want to waste any yarn, you can cut them in small batches instead. It’s so easy to go back and cut a few more that you don’t need to worry about trying to cut them all at once.
Step 3: Tie Yarn Pieces
Next, tie the yarn pieces to the ring. To do this, take one strand of yarn and fold it in half. Put the folded end through the ring.

Then bring the two ends of the yarn over the ring and through the loop of yarn.
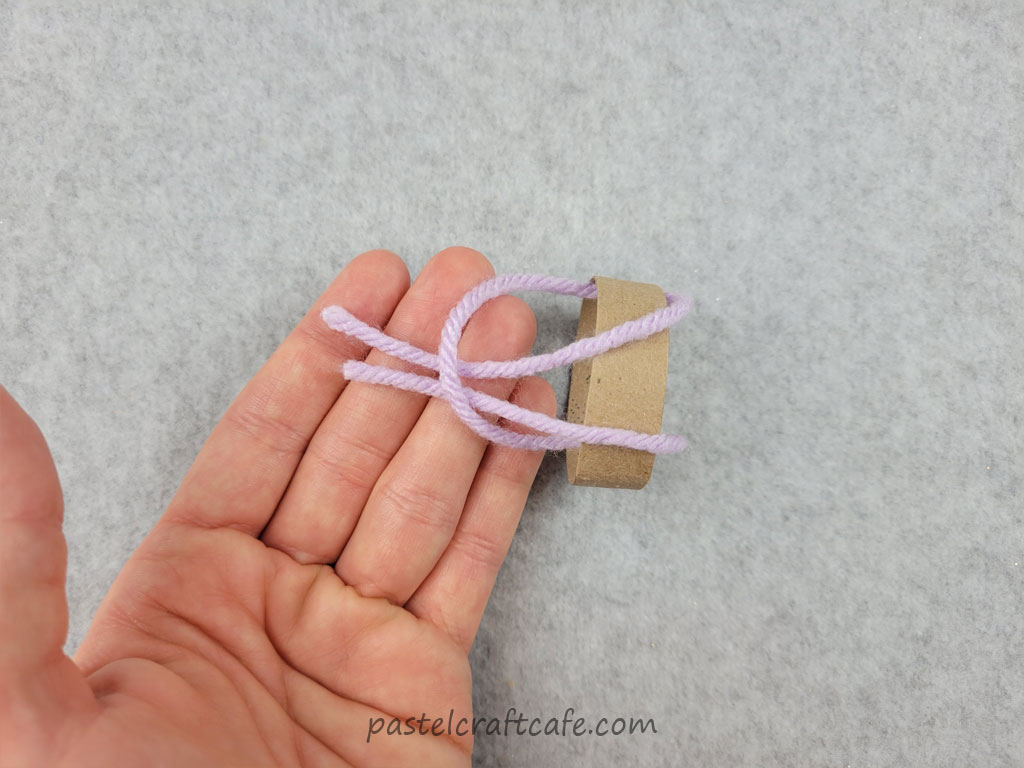
Finally, pull the yarn to secure it in place.

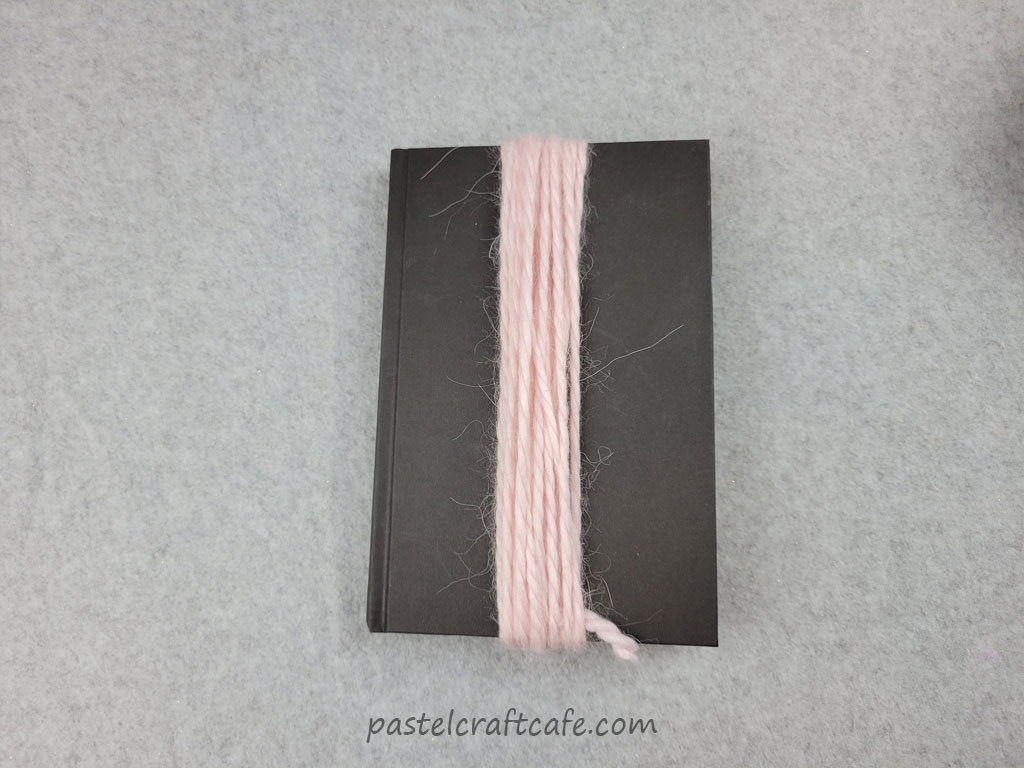
Continue tying pieces of yarn around the brim of the hat. Keep going until you can no longer see the cardboard tube underneath.

TIP #1: Try to keep your yarn pieces as even as possible when you fold them. If either side is too short it can mess things up later.
TIP #2: Knot your yarn onto the ring the same way every time. When the yarn is tied, one side of the brim will have a little knot. I prefer when mine are on the outside of the hat.
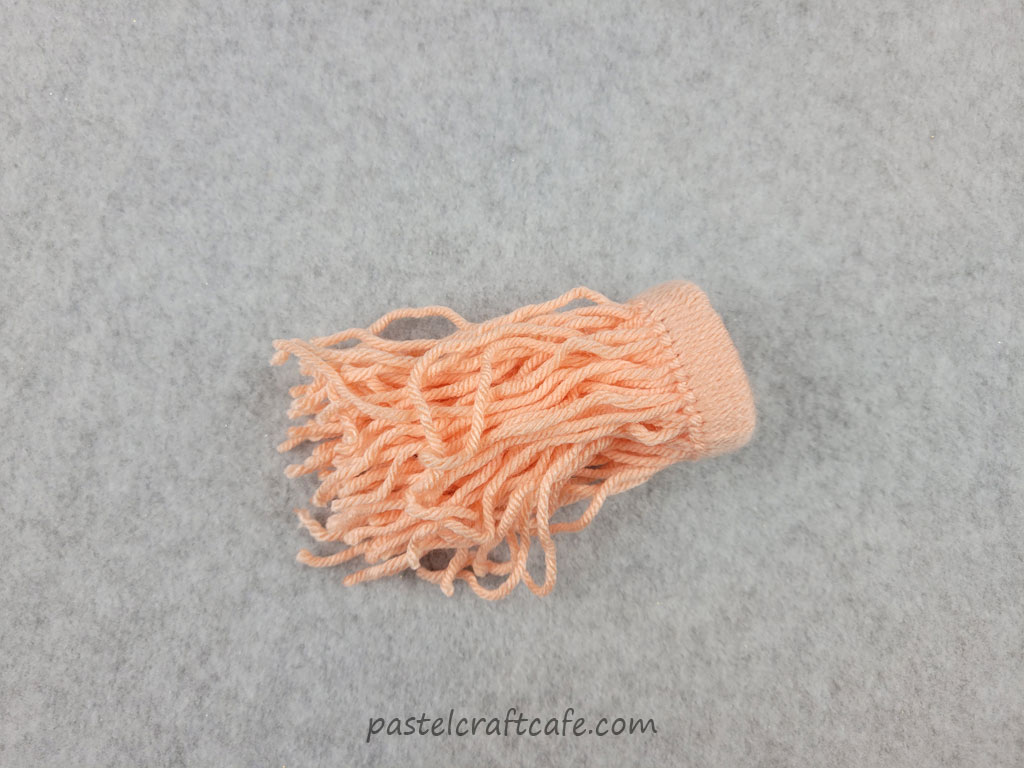
Step 4: Push Yarn Through Circle
This part is pretty self explanatory. Just take all your little yarn ends and push them through the ring to the other side.
Doing this creates more of a contrast between the brim and the rest of the hat. It’s all starting to come together.

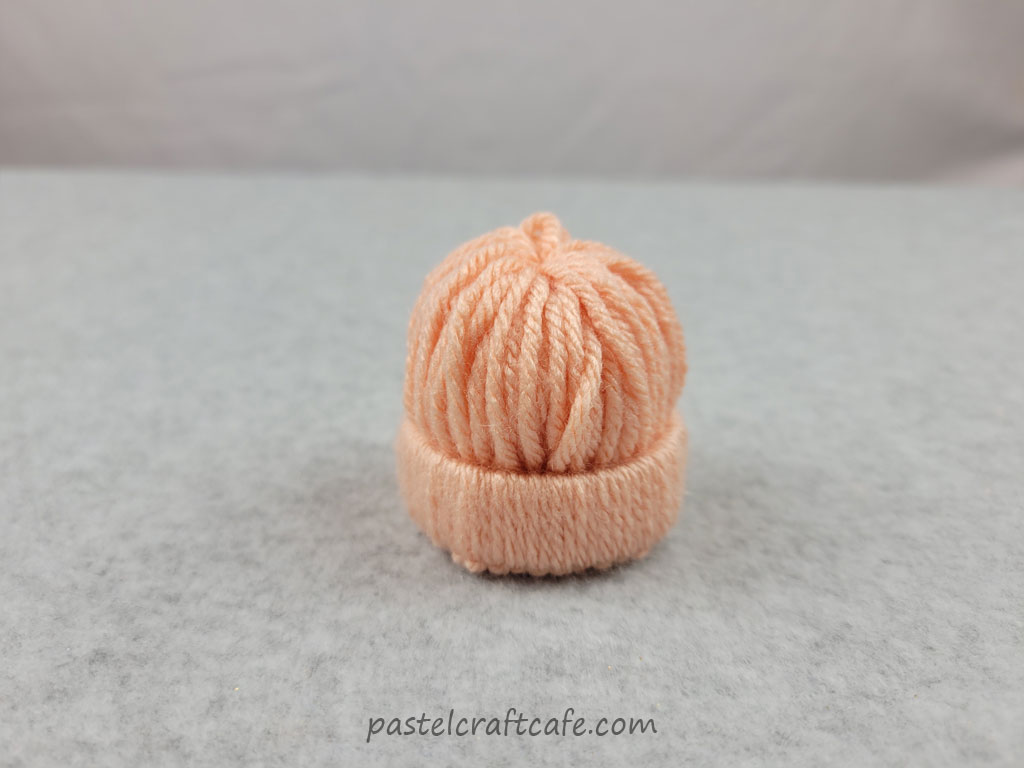
Step 5: Tie Hat to Make Pom Pom
Now it’s time to really make this look like a little hat. And to do that, we need to make the pom pom at the top.
Cut another piece of yarn. Around 12 inches is good, but doesn’t really matter. Then decide how tall you want the hat to be and tie it.

Try to tie your yarn as tightly as possible. I like to tie two knots just to make sure everything stays put.
It still looks pretty messy, but that will all be fixed up in a bit. You can trim your pom pom now if you like, but I prefer to wait until the next step.
Step 6: Stuff Hat and Trim Pom Pom
The hat is almost done, but still looks a little flat. To fix this, just add a bit of stuffing. If your don’t have stuffing, a cotton ball or even some wadded up tissue will work just fine.
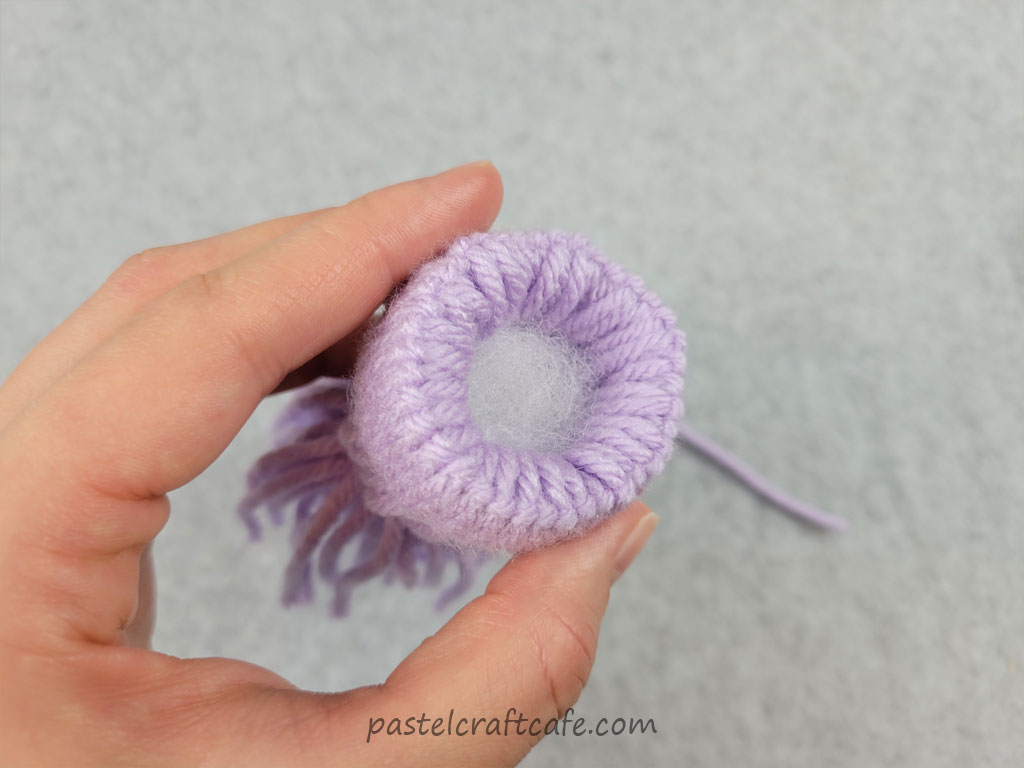
TIP: You only need a little bit of stuffing, so don’t overdo it. If you overstuff your hat, the yarn will separate and you will be able to see the stuffing underneath.
Depending on what you plan to do with your mini hats, you might want to cover up the bottom so the stuffing isn’t showing. You can do this by gluing a circle of scrap fabric or scrapbook paper to the bottom. I didn’t feel the need to do that on any of my hats though.
Lastly, trim up the yarn at the top of your hat to make a nice pom pom.
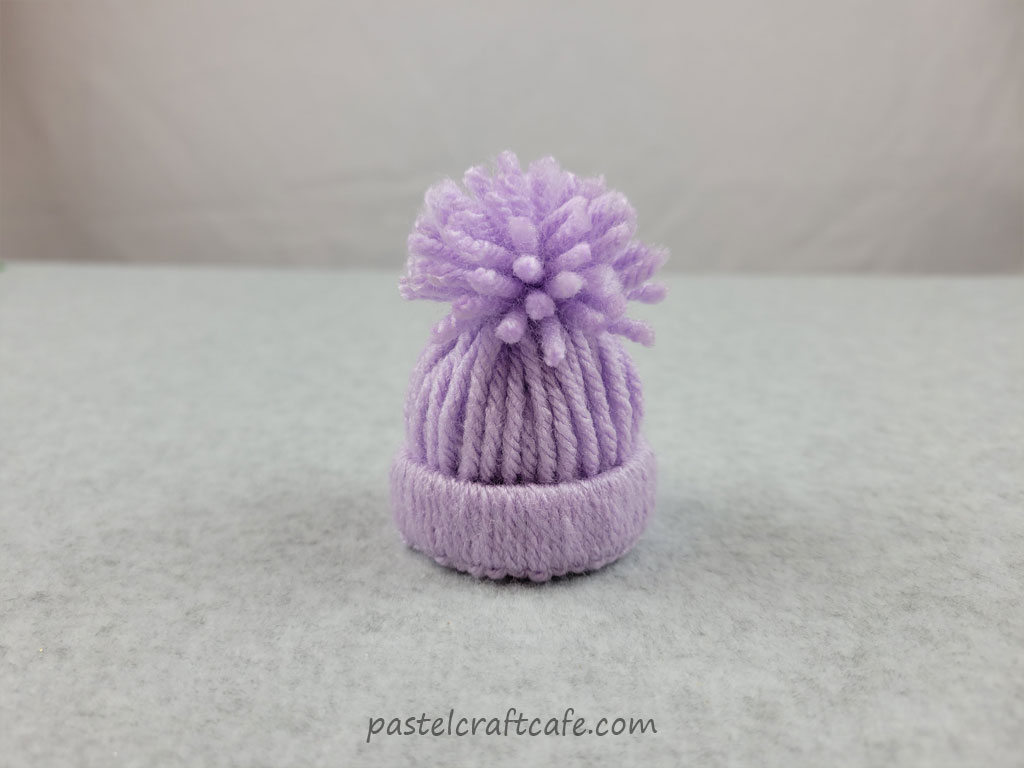
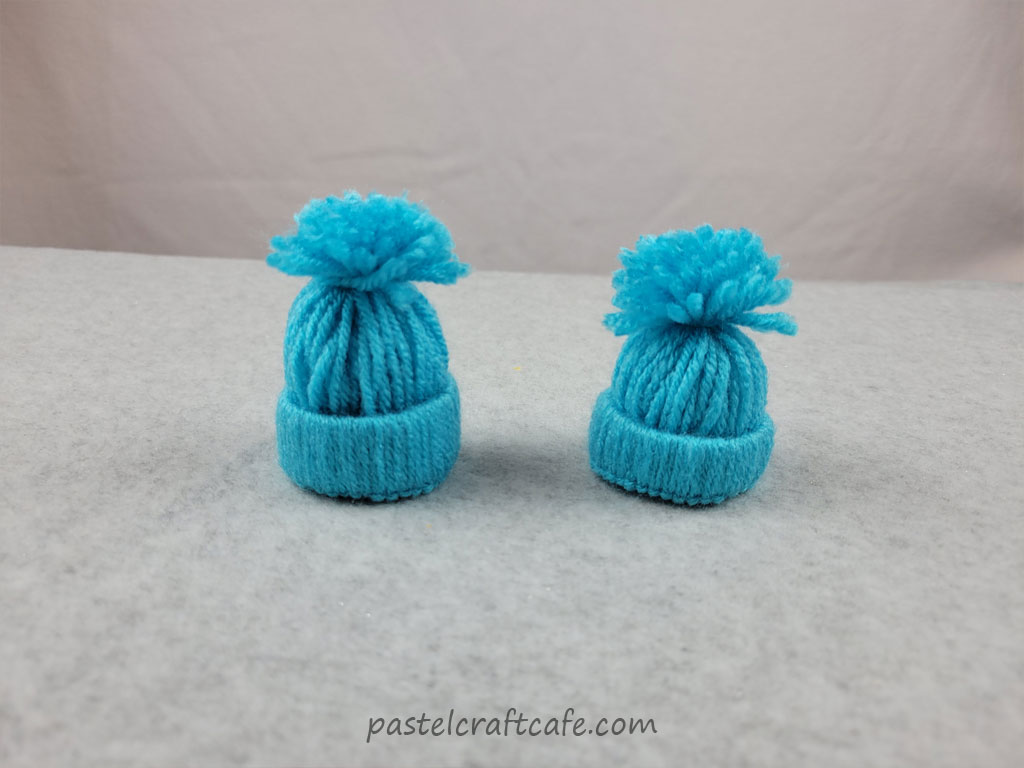
And with that, your adorable mini yarn hat is ready to be displayed in your next craft project!
But if you’d like to know how to do some variations to your mini yarn hat, read on! I put together a few more hats to show how else you can customize the sizes to whatever you want.
Making Even Smaller Mini Yarn Hats
So the standard yarn hat is a nice size for many projects. But what if that’s still too big for what you need? Well not to worry, because you can make them smaller too!
I was able to use the same type of medium weight yarn that I made the standard hat out of. A really thin yarn like a sock yarn would probably look even better, but I haven’t tried that yet.
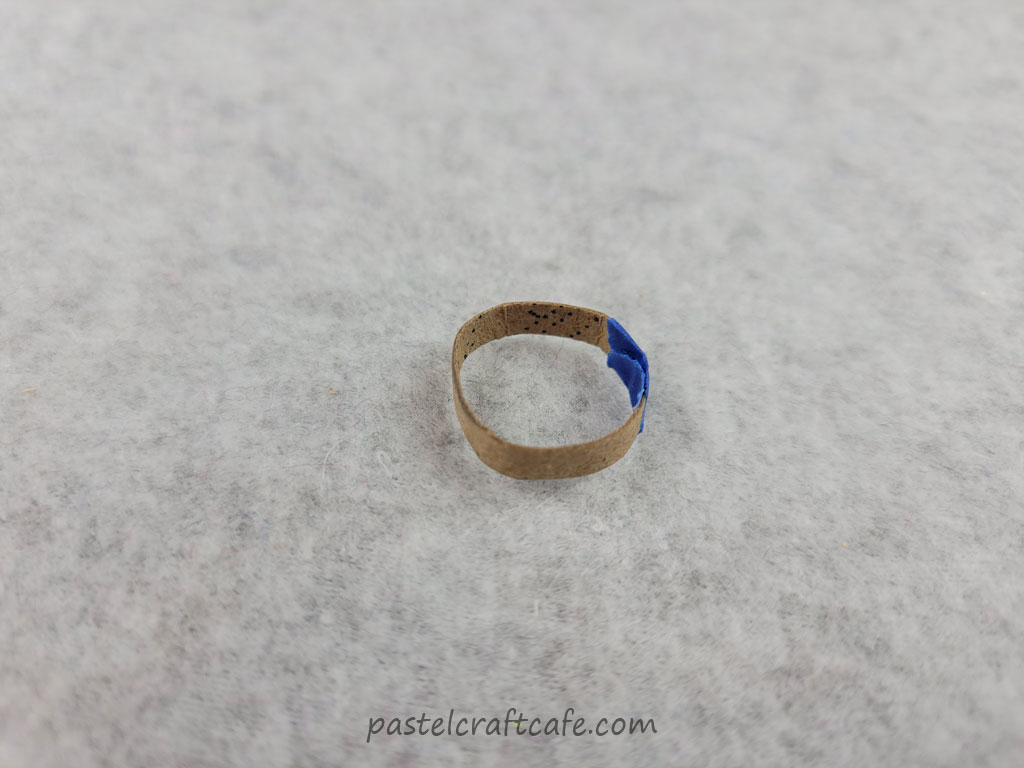
I still used a toilet paper roll for the brim of my hat, just cut a lot smaller. I cut a piece that was 1/8 inch thick and 2 inches long.
To secure the ends together to form a ring I used a bit of tape. I used painters tape so it’s easier to see (and also because it’s the only tape I had). If you want the tape to be a little less obvious you can of course use clear tape. Though everything will be covered with yarn so it doesn’t matter too much in the end.
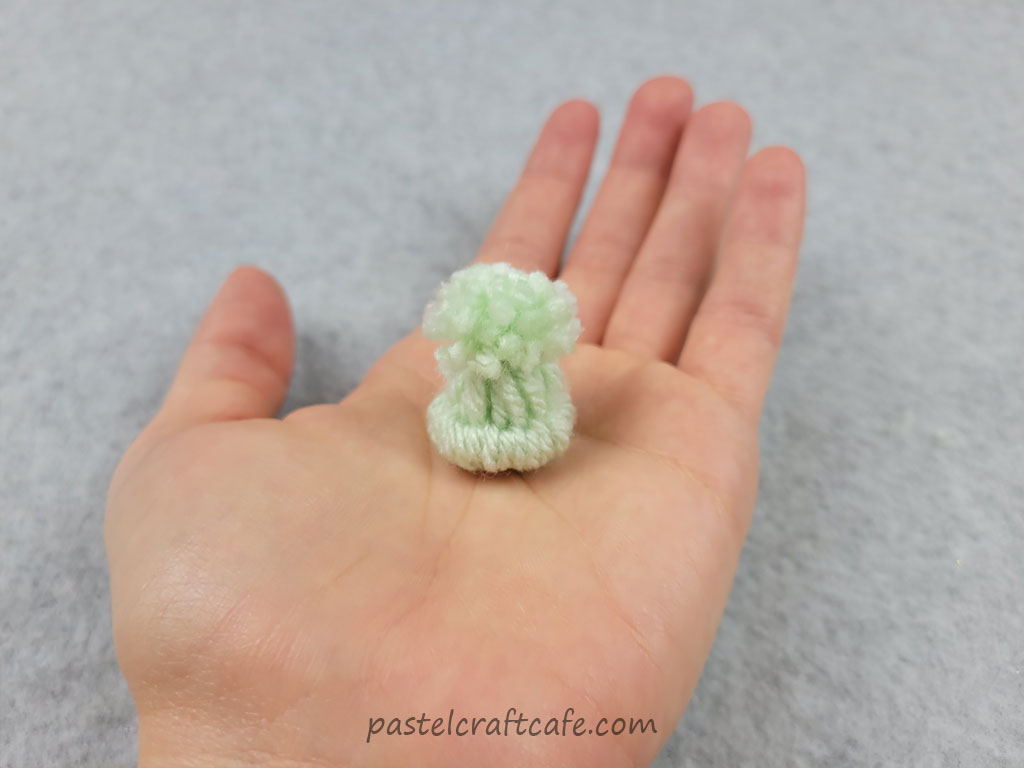
To get the right size of yarn I wound it around three of my fingers. This time I only needed around 20 strands.

From here you make the hat just as you would with the regular size. When you’re finished it will look just like the other hat but much smaller.
I also tried making the mini hat using embroidery floss. It worked really well until I got to the end. Most of the hat looked great but the pom pom looked a little funky.

If you wanted to use embroidery floss, it would probably look better if you used a different color pom pom. I’ll explain how to do that a bit later in the tutorial.
Making a Not So Mini Yarn Hat
So what if you want to make a bigger hat? That’s totally possible too!
For the brim this time I used an empty roll of tape. It ended up being the perfect size.

Because the hat is so much bigger, I figured it would be held together much better with a thicker yarn. I had a pink alpaca yarn that had been sitting in my stash for years, so I’m happy to finally put it to some good use.
This time the strands needed to be a bit longer. I used the long end of a book to wrap the yarn around.
Now tie the yarn onto the brim just like all the other hats. It took me about 45 strands of yarn to go all the way around.
And here’s what it looks like when it’s finished:

If you want to make multiple larger hats and don’t have a bunch of empty tape rolls lying around you can also use thick 110lb cardstock. I did that with another large hat and it worked just as well. This allowed me to cut the exact size I wanted while still being made of a material that wouldn’t be crushed when I tied my knots.
I cut my cardstock to about 10 in x 1 in to match the size of the tape roll. Like the super mini hats, I held it together with some painters tape.
How to Make Mini Yarn Hats with a Different Color Pom Pom
If you don’t want the hat to be the same color as the pom pom, not too worry! By just adjusting the steps a bit, you can easily add any pom pom you want.
Start by doing steps 1-3 the same as above. Cut your ring, cut your yarn, and tie the yarn strands to your ring. After that is when things get a bit different.
Instead of pushing the yarn strands through the ring, you need to tie them first. Give just a little more space than you would in the usual method.

Now you can push the yarn through the ring. If some of the yarn is too long you can trim it a bit so it’s not hanging out the bottom.
The tie will keep everything together to create the top of the hat. And the yarn takes up enough space that you don’t even need to stuff it.
The only thing to do now is add the pom pom. You can use a pre-made pom pom, or you can make one yourself. Making your own pom pom is a great way to customize your hat. That way you have full control of the color and size of your pom pom.

If you need help making your pom pom, check out my article on six different ways to make a pom pom. Depending on the size of your hat, some methods might work better than others, so play around and find what works best for you.

Additional Notes on Mini Yarn Hats
When it comes to these cute little hats, you’re only limited by your imagination with how they can look. Try all different kinds of yarns and make them on all different kinds of sizes to perfectly suit your projects.

Overall I found that the larger the hat, the easier it was to work with. The tiny hats especially were a bit hard to hold onto sometimes. But the end results were still plenty worth it.
If you wanted to decorate these hats even further, they would also look great with some extra embellishments. Stickers, rhinestones, sequins, and other little decorations would all look great. Just be creative and have fun!
I hope that you enjoyed this tutorial and found it helpful. If you have any questions or comments, please feel free to leave them below. I’d love to hear from you! Thank you for stopping by and happy crafting!

If you liked this tutorial, don’t forget to pin it for later on Pinterest!
Try These Projects Next!


Thanks that was really helpful and very well explained with the pictures. Thanks for the inspiration😊
You’re very welcome, Diane! Happy crafting!
This is exactly what I was looking for to make pill bottle gnomes with removable hats! Thank you so much for the wonderful instructions! Big help to this ole lady who just got the ‘gnome bug.’
Hi Jacki!
I’m so glad my tutorial was helpful, and using them for pill bottle gnomes sounds adorable! Good luck on your project!
Thank you. The pictures really helped. I’m looking forward to showing my grandweans how “cool” I am😁.
You’re very welcome, Ann! I’m so glad my tutorial could be helpful for you!
Thank you, exactly what I needed!
I made these for favors for our Christmas party! Instead of stuffing them with cotton I put a Linder piece of candy in the bottom! Turned out cute! Thanks!
That’s such a cute idea to stuff them with candy, I love it! I’m so glad they turned out well!
I’ve been obsessed with making these! I made some for Christmas and now I’m making more for Valentine’s Day. They are super cute and fit perfectly as a topper to gift a bottle of wine.
I’m so happy to hear that! And using it as a wine bottle topper is such a cute idea.