
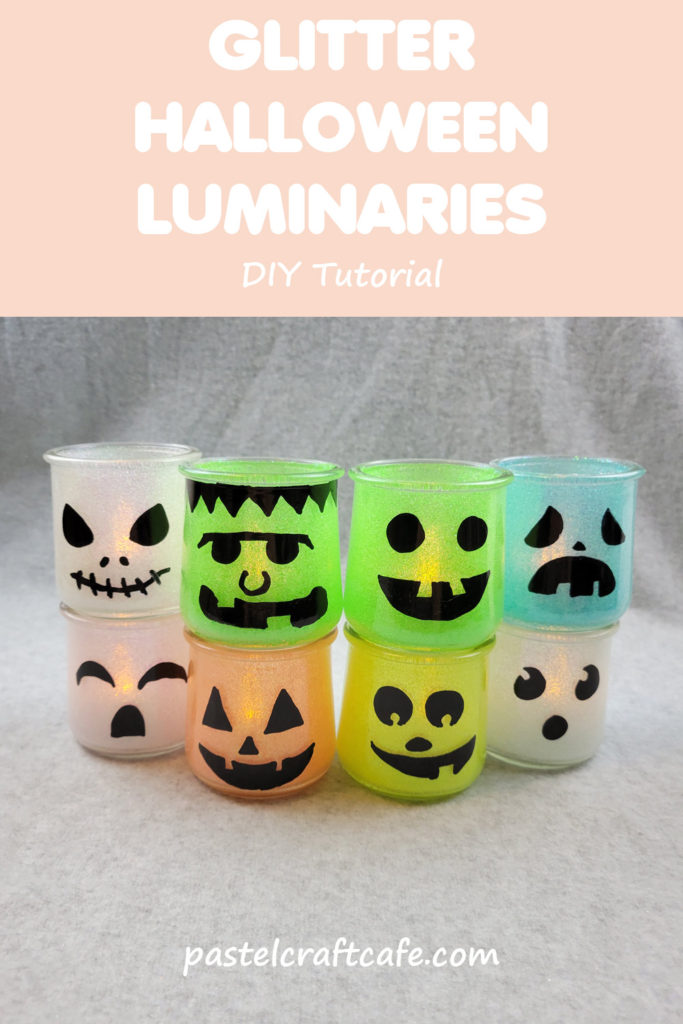
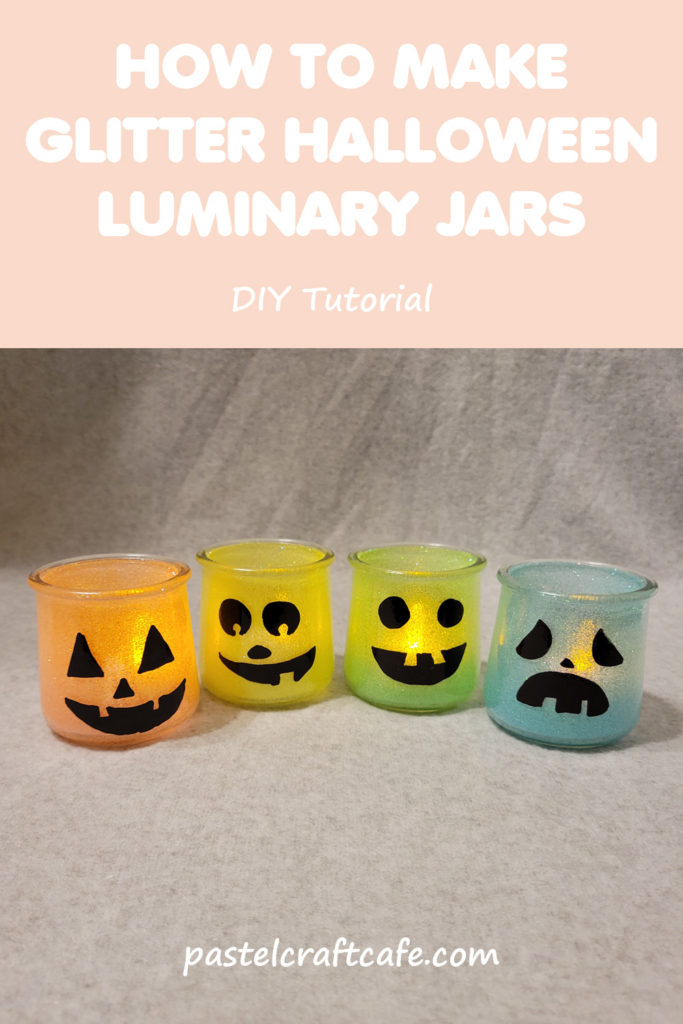
Make these adorable glitter Halloween luminary jars to add a soft spooky glow to your decorations this year. There are so many fun faces you can add to your jars that the possibilities are almost endless.

Last year I regrettably didn’t get a chance to make any Halloween projects. Along with Christmas, it’s one of my favorite holidays and I’m sad that I missed out. So this year I wanted to make sure I at least did one or two projects. I’ve been wanting to do some sort of luminary for awhile. Therefore, I thought it was a good opportunity to make a Halloween styled lantern with a mini tealight inside.
I originally played around a bit with some old shot glasses that I had bought years ago to make mini candles with. But it quickly became obvious that they were just too small to fit the tealights. So I needed something a bit bigger.
At first I thought about buying some small jars to make this project. But then I remembered that the Oui brand yogurt came in little glass jars that would be absolutely perfect for what I wanted to make. So on my next grocery run I picked up a handful. Not only were the jars the perfect size and shape, but as a bonus I got some delicious yogurt too. Score!
You can of course use any empty glass jars you have on hand for this project. I’m just happy I was able to upcycle some jars instead of having to buy completely new ones. I can’t wait to put all these cute little luminaries on display!
What You Will Need to Make Glitter Halloween Luminary Jars
Note: This post may contain affiliate links, which means that if you click on a link and make a purchase, I may earn a small commission at no extra cost to you. For more information, please see my Disclosure.
Glass Jars

I’d also suggest having something to catch any excess glitter. As usual I just used a sheet of wax paper. This will make it much easier to clean up. Because glitter gets absolutely everywhere no matter what you do. Might as well at least try to contain it, right?
Speaking of glitter, I’m using an extra fine one to decorate the insides of these jars. Because there is only one thin layer of glitter being used I don’t think a chunkier glitter would work very well. You would most likely have issues either with bald spots in your glitter layer or the light from the tealight wouldn’t shine through as well.
How to Make a Glitter Halloween Luminary Jar
Step 1: Prepare Jar
Before starting on your project you will most likely need to do just a tiny bit of prep work before you can begin crafting. Exactly what you need to do will depend on the jars you are using.
Because I was upcycling my jars, I needed to remove the stickers from the outside. There are a handful of different ways that you can do this. I prefer to use as few chemicals as possible so I needed a method that fit my needs.
Thankfully, I found this amazing tip from this post over at the blog Claire K Creations that suggests using boiling water to loosen the sticker. It worked like a charm and the stickers peeled right off with little to no fuss.
On a few of them there were some tiny bits of sticker residue left behind. I was able to get them off by using a bit of peanut butter. I’ve also heard you can use cooking oil mixed with baking soda. Or if you don’t mind going the chemical route, you can use something like Goo Gone.
Then I wiped both the inside and outside of my jar with a little bit of rubbing alcohol. This part is optional, but helps to get rid of any little bits of dust, grease, etc that could be lingering on the glass. This will help everything stick a bit better when you are decorating your jar. I would recommend doing this whether you are using either new or recycled jars.
Step 2: Apply Glue to Jar
Now that the jar is all cleaned up, it’s time to craft! Start by grabbing your Mod Podge and a paintbrush. Any paintbrush should work, but I’d suggest a wide and flat one like in the picture above.
Then apply your Mod Podge to the inside of your jar. This coat should be as thin and even as you can get it. You want there to be enough Mod Podge for the glitter to stick, but not so much that you end up with noticeable clumps.

I find it easiest to start by painting the bottom of the jar. You don’t need to worry too much about getting this perfect. The bottom of the jars aren’t going to be very visible anyway.
Then move on to adding Mod Podge to the sides of the jar. This is the part you want to be a bit more precise on. It’s also where having a wider brush comes in handy.
After brushing the glue all over the inside, I like to go over everything again a few times. Inspecting the outside of the jar while you do this makes it a bit easier to see if all your brushstrokes are even.
When the layer of glue looks good, it’s time to quickly move on to the next step. You want to make sure everything stays sticky enough to hold onto the glitter.
Step 3: Add Glitter to Jar
Grab your glitter and pour a generous amount into your jar. Don’t worry about the amount, as there’s no such thing as “too much.” Any extra can easily be saved later.
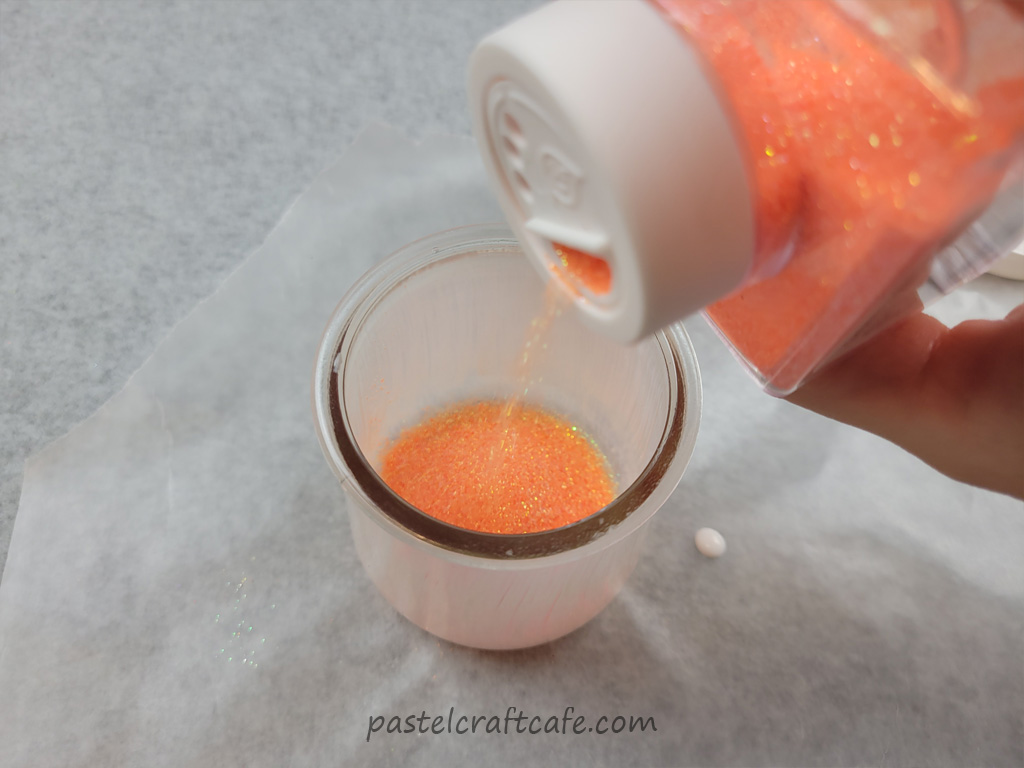
Then tilt your jar a bit and slowly turn it until the inside has been completely covered in glitter.

While doing this part I worked with a small piece of wax paper under my jar. When your glitter is getting up to the edges it’s hard to not have at least a little bit spill out.
You will also probably have some extra glitter on the inside of your jar. This can be put back into your glitter container so it isn’t wasted.
Now put aside your jar so the Mod Podge can dry completely.
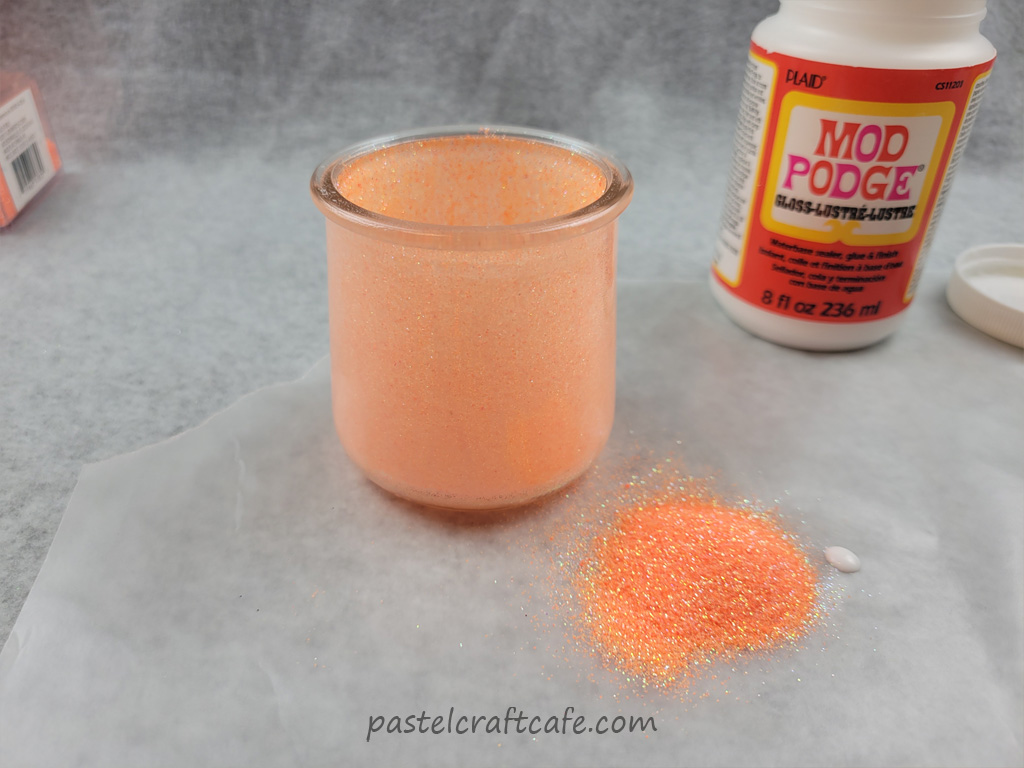
I left mine to sit overnight so I don’t know exactly how long this takes. But you’ll know it’s done when the glue goes from a milky white color to completely clear.
When I work with glitter I almost always add at least two layers to whatever I’m crafting. But this time I wouldn’t use more than the one layer. If the glitter is too thick, none of the light from the tealight will be able to shine through. And if there’s no light then it isn’t much of a luminary, now is it?
Step 4: Seal Glitter (optional)
When I work with glitter, I almost always opt to seal it afterward. This keeps the glitter from shedding all over the place. Because as I mentioned earlier, that stuff gets absolutely everywhere.
However, unlike most other things I would be adding glitter to, this time it’s been added to the inside. So there’s not nearly as much risk for having glitter all over the table, floor, etc.
I don’t think it’s necessary to seal the glitter this time around. But you will need to reach your hands into the jar every time you want to turn the tealight on and off. When doing that you’ll probably still get some bits of glitter that come loose. So I figured I would mention sealing the glitter this time too in case anyone wanted to do it.
To seal the glitter, simply take your brush from earlier and add another thin layer of Mod Podge on top of your glitter. As long as you let everything dry long enough, only a very small amount of glitter is likely to come loose. Then leave your jar to dry again.
Adding another layer of Mod Podge gives just a slightly more frosted look to the glass. But it’s only barely noticeable when the tealight is on. Otherwise you can’t tell at all.
Step 5: Decorate the Outside with Paint Pen
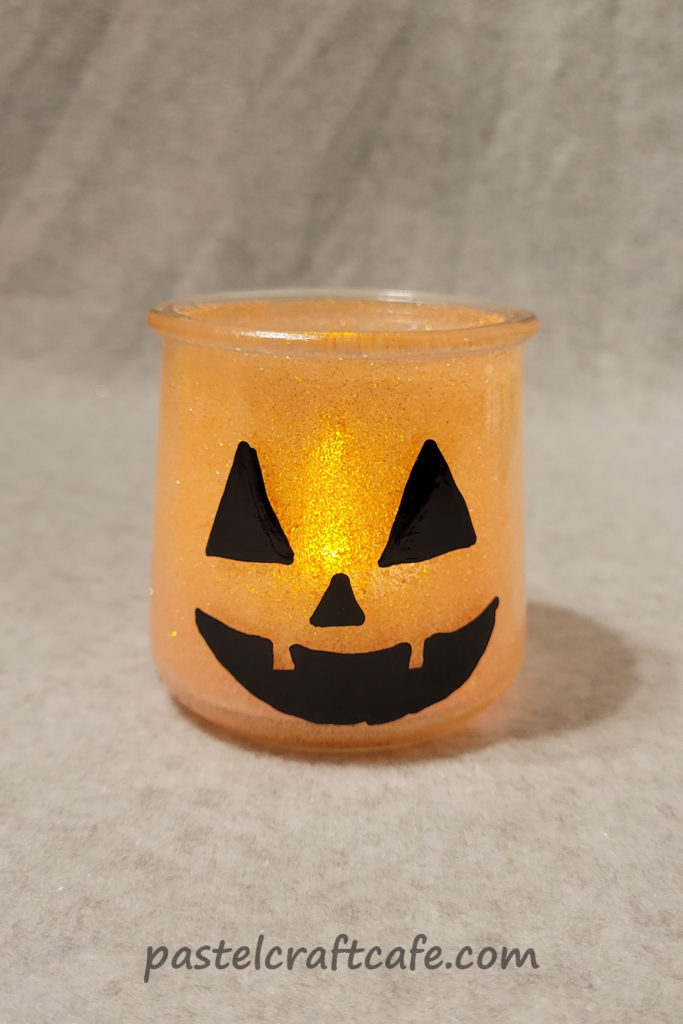
When the Mod Podge has completely dried, you can move on to decorating the outside of your jar. For this example I painted on a pumpkin face. But you can do any sort of design you want.
The paint pen I used is oil based. So it glides smoothly on the glass and is very opaque. Just be careful not to smudge the paint at all.
For my example jar, I chose to do a pumpkin face because I used orange glitter. After painting on the face, let it dry for a bit (20-30 minutes) so the paint doesn’t smudge.

I’ve read that you can bake the paint from these pens on your glass. It makes the paint a bit more permanent and scratch resistant. But that is more for things that will be washed/handled a lot, like a ceramic mug.
I didn’t think I needed to bake mine, as I didn’t think they would see too much use. But if you did, you would want to do that first before adding any glitter or Mod Podge.
To bake, set your painted jar in a cool oven and set it to about 325 degrees. Then bake for about 30 minutes and let cool completely before removing from the oven.
Step 6: Add a Tealight and Watch it Glow!
Now that your jar is finished, add a tealight and enjoy your new glitter Halloween luminary! I just love how it adds a soft glow to the room.
These were so fun and easy that a made a whole collection of glowing Halloween jars. From pumpkins, a Frankenstein, ghosts and a skeleton, there are so many different fun faces you can add to these jars!

Glitter Halloween Luminary FAQs
I have bald spots after applying my glitter. What happened and how do I fix this?
If you end up with bald spots after adding your glitter, something probably went wrong when you applied the Mod Podge. Most likely there were places that didn’t get covered or dried a bit.
You can use a small brush to add more Mod Podge and glitter to the empty areas. But if you do this it ends up being super noticeable.
If the bald spots aren’t very noticeable, you might be able to just leave them. For example, if you have a few spots that are only on one side, just decorate the other side so the bald spots are on the back. Or if you have a small spot that can be covered up with your design, you won’t be able to see it.
If neither of these options will work, you can always start over.
If I start over can I still save the jar?
Yes! Thankfully even if you make a big mistake you can still salvage your jar and try again.
If you want to start your glitter layer over, you need to seal the inside of the jar. This will create a solid layer of Mod Podge that can be removed after it dries. The quickest way is to brush another layer of Mod Podge on your glitter like I explained in Step 4.
Then leave the jar to dry completely. Afterward, starting from the top of your jar start peeling away the glitter and glue.

It actually comes away pretty easily and doesn’t leave any residue behind. In most cases, it will come apart in one solid piece like this:

If you need to redo your paint on the outside, use a bit of rubbing alcohol on a cotton ball or swab to wipe it away. If you can, it’s best to clean up your design before the paint dries. When it’s still wet, it’s much easier to wipe it away. It’s still completely possible to use the alcohol even on dried paint, though. You’re just going to need to scrub a lot harder to remove it.
Do you need to use a paint pen or can you use regular Sharpies?
Technically yes you can use a regular Sharpie, but it won’t look as good. Regular Sharpie markers are much more transparent when applied to glass. So any design you draw on isn’t going to show up as well.
How else can you decorate the outside of the glitter Halloween luminary?
If you’re not confident drawing on your jar freehand, you could use a stencil. Then your design could be applied to the jar using a multi-surface paint and a sponge.
You can also use stickers or vinyl. If using vinyl that’s cut on a cutting machine like Cricut or Silhouette, you can make your design much more precise. You also don’t need to worry about your paint chipping.
Additional Notes on Glitter Halloween Luminary Jars
I really like how these Halloween luminaries came out. They were fairly quick (excluding any drying time) and simple to make. If you have enough empty jars on hand it’s really easy to get carried away!

Although I made this batch with a Halloween theme, you could decorate them to fit any season or holiday. Or you could stop after adding the glitter. Then they could be used all year round. There are so many fun possibilities!
I hope that you enjoyed this tutorial and found it helpful. If you have any questions or comments, please feel free to leave them below. I’d love to hear from you! Thank you for stopping by and happy crafting!
If you liked this tutorial, don’t forget to pin it for later on Pinterest!
