Out of all the pom pom DIY methods, finger pom poms use the least amount of supplies and requires the least amount of prep work, since instead of a typical pom pom maker you are using your fingers instead.
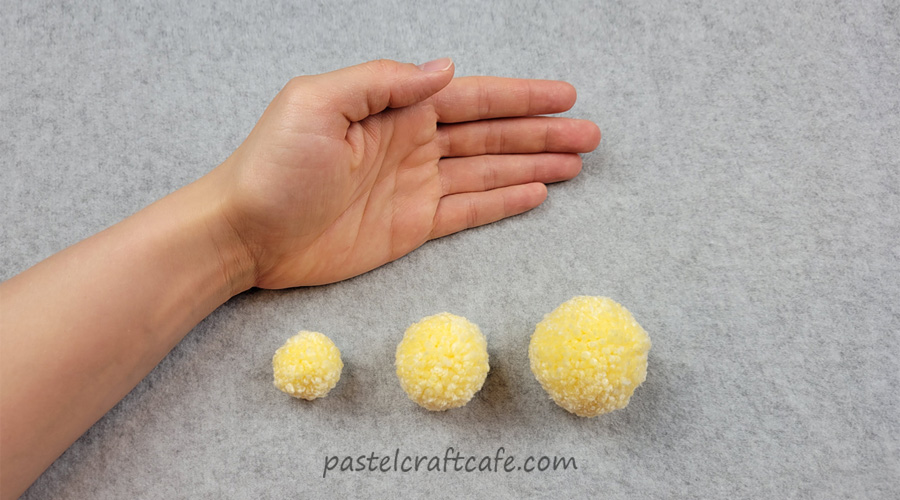
Another advantage of using this method is that depending on how many fingers you use to wrap your yarn around, you can get three different size pom poms. The exact sizes will vary a bit depending on the width of your fingers but using two fingers will yield a pom about 1.25” wide, three fingers will get you a pom about 1.5” wide, and four fingers will make a pom about 2” wide.
What You Will Need for this Project
Note: This post may contain affiliate links, which means that if you click on a link and make a purchase, I may earn a small commission at no extra cost to you. For more information, please see my Disclosure.
Yarn

You can use any standard scissors you have on hand, but I HIGHLY recommend these ones when making these or any other pom poms. It’s much easier to snip the loops of the pom pom using the straight pointed tips and when it comes time to trim, the spring in the scissors keep your hands from getting too tired. It’s especially useful if you are making a lot of pom poms at once.
How to Make Finger Pom Poms
Step 1: Cut a Small Piece of Yarn
First cut a small piece of yarn about 9 to 12 inches long. The more fingers you are using to make your pom pom, the larger your yarn piece should be so that it can fit all the way around. Then slide the yarn piece between your fingers where it will stay until step three.
The size of the pom pom you plan to make will decide where you place the yarn. If you are using either two or three fingers, place the yarn between your index and middle finger.

If you are using all four fingers, place the yarn between the middle and ring finger.

And just to make sure I put it out there, I would definitely suggest using your non-dominant hand to make the pom pom on. That way your dominant hand is free for the work that requires a little more dexterity.
Step 2 : Wrap Yarn Around Fingers
Now you can start winding your main yarn around your fingers. Spread your yarn out a bit so you aren’t winding it all in one place, but also try not to get too close to the end of your fingertips. If you do, the yarn loops can easily start sliding off.
Also, you don’t want the yarn to be loose around your fingers but be careful not to wind it too tightly either. The last thing you want is to cut off the circulation to your fingers. To help keep this from happening I will start winding my yarn with my fingers just slightly held apart. By the time I’m done my fingers have usually closed together but at least the most inner loops aren’t too tight by that point.
In the picture below you can see about how far I hold my fingers apart when I’m starting.
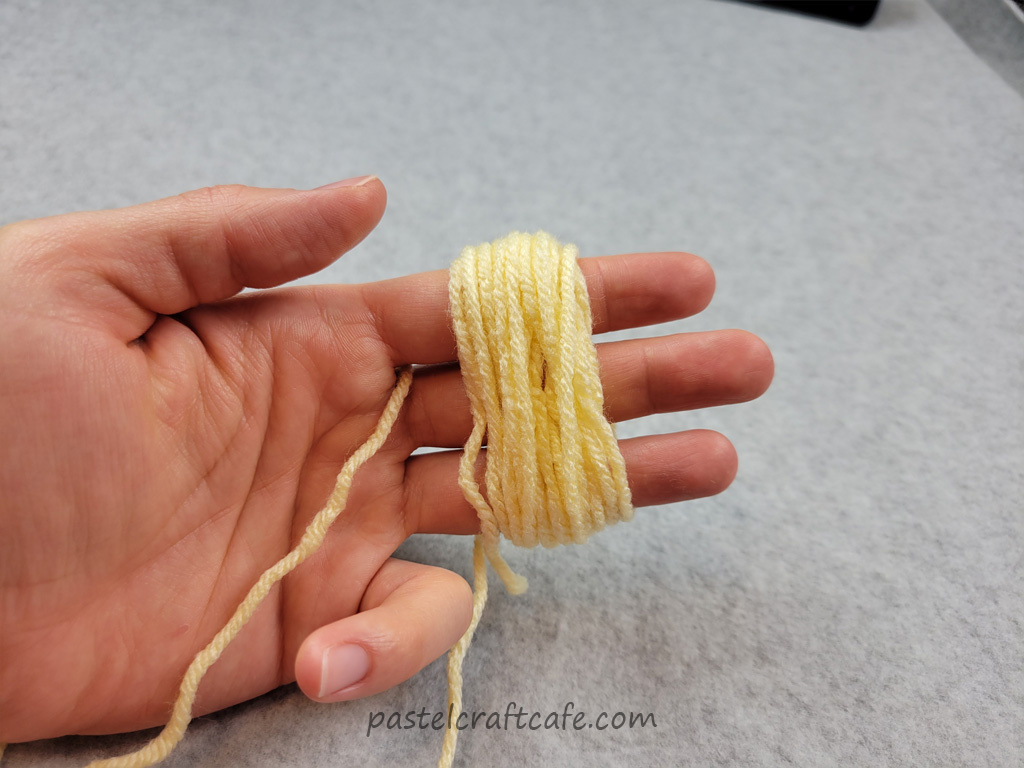
Again, the size of the pom pom is going to determine how many times you wind the yarn around your fingers. If using two fingers, wrap the yarn around about 50 times.
If using three fingers, wrap the yarn about 100 times around.

And if you are using all four fingers, the yarn needs to be wrapped about 150 times.

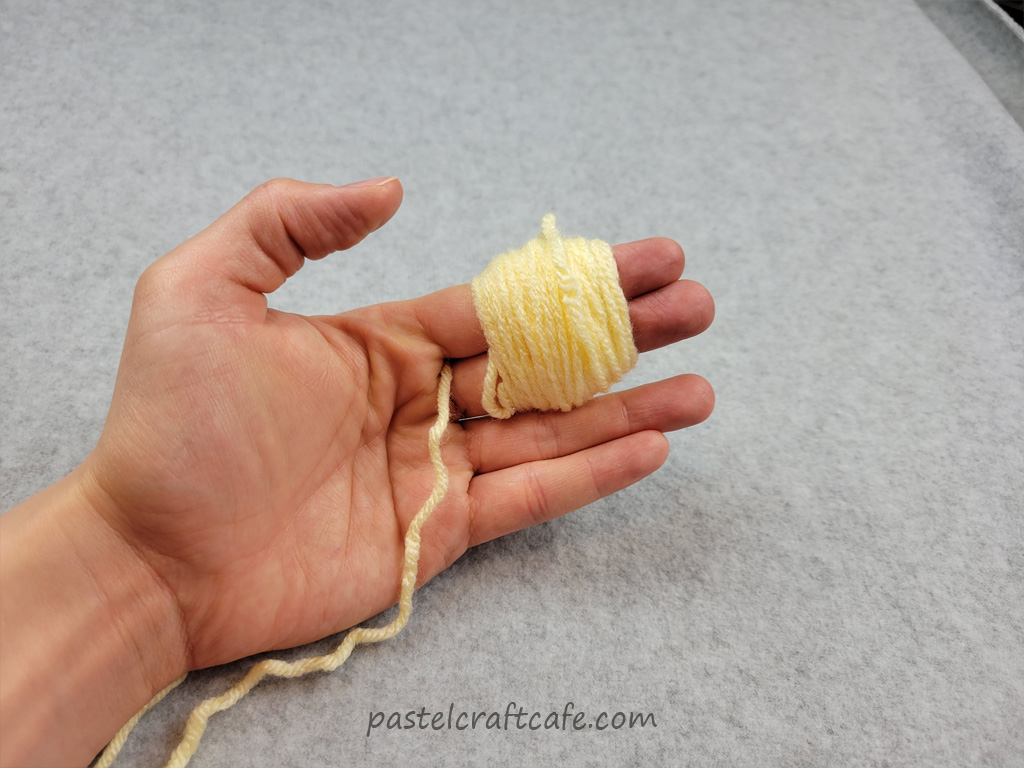
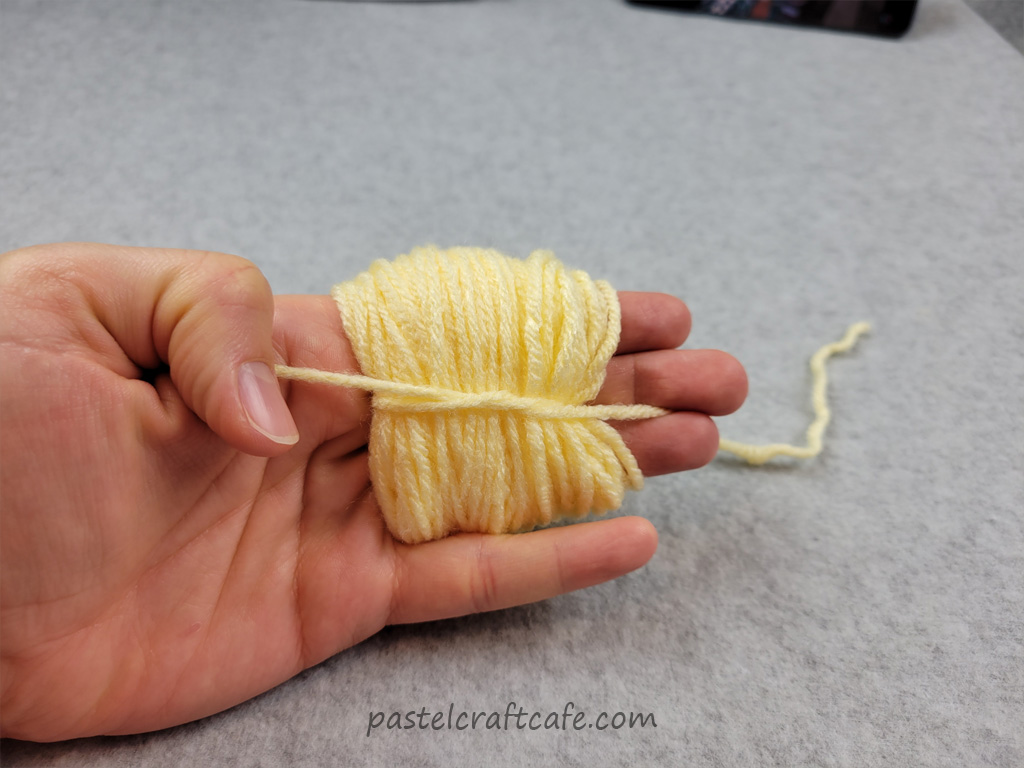
Step 3: Loosely Tie String and Pull Bundle Off of Fingers
Grab the small yarn piece that you put between your fingers in step 1 and wrap in around the back of the yarn and to the front through the same two fingers you put the string between. The only exception is if you are using three fingers. In that case, bring the yarn piece forward between your middle and ring finger. Doing this will center the string a little better around the ball of yarn.
Here’s how it looks on two fingers:

This is what it looks like on three fingers:
And lastly, here’s what it looks like on four fingers:

Then loosely tie the string, just enough so it stays in place. After that, you can carefully slide the ball of yarn off your fingers.
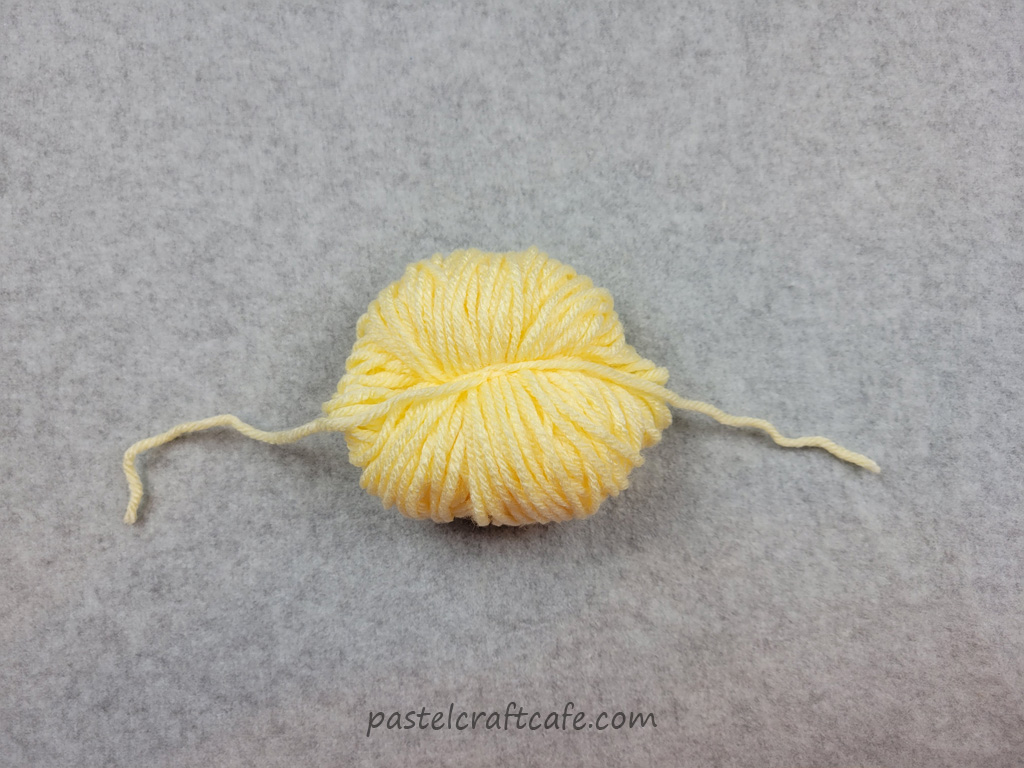
Step 4: Tie String Tightly
Now that the yarn ball is off your fingers you can tie the string more securely. Keeping the string at the center of the yarn, pull it as tightly as you can and tie a knot. If you are having trouble getting the knot super tight and there’s still a little slack, you can turn your pom over and tie another tight knot on the other side to make things a bit tighter.
Here’s what the two finger pom pom will look like:

This is the three finger pom pom:

And here is the four finger pom pom:
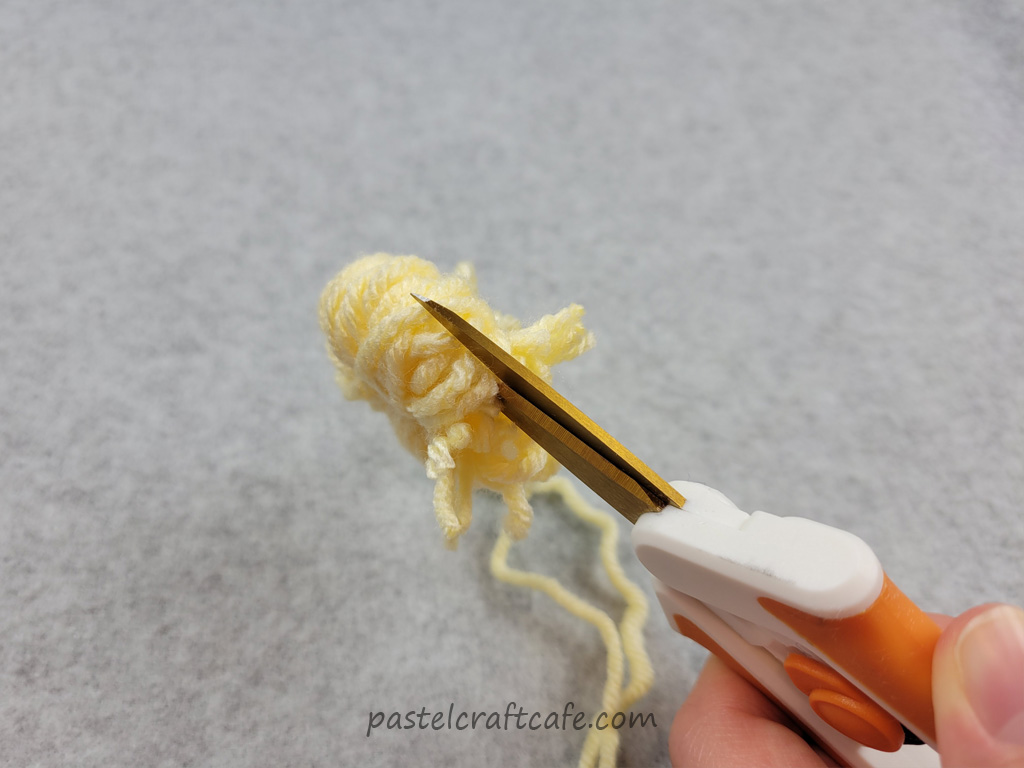
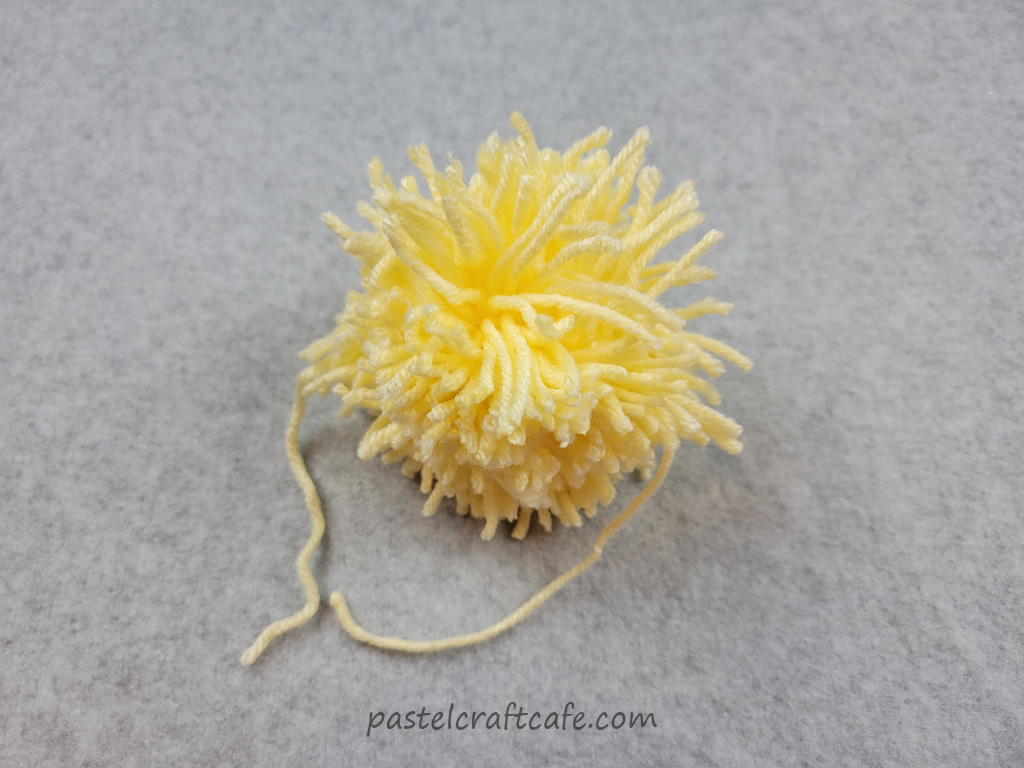
Step 5: Cut Yarn Loops of Finger Pom Poms
Using your scissors, begin cutting the loops around the edge of the pom pom. While you are cutting, push the already cut loops apart so you don’t miss any of the ones hidden underneath. Just be careful not to accidentally snip the middle string or the whole thing will come apart.
With the two finger pom pom there isn’t much to cut. Therefore it’s much less likely that you’ll miss any loops or cut anything that you shouldn’t.
A three finger pom pom is noticeably bigger. You will need to pay a bit more attention to make sure you cut all the loops.

Lastly, a four finger pom pom is pretty big. You will need to poke around a bit during your cutting to make sure you get any loops hidden more toward the center.
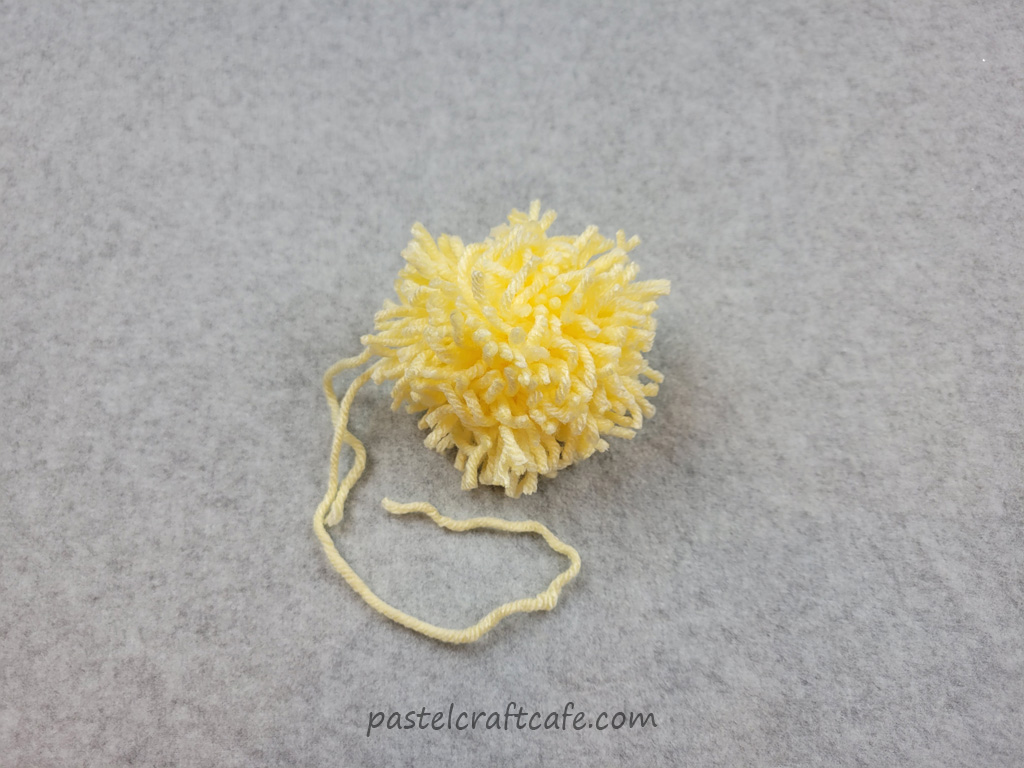
After cutting, your finger pom poms will finally look like actual pom poms! There’s still some final trimming that needs to be done, but you’re almost there.
The two finger pom pom looks pretty good and will just need a little trim.

The three finger pom pom is quite a bit messier, but still looks alright. It’s going to take a bit more trimming to get this one to look good.
Finally, the four finger pom pom has a lot of work needed to be done before it looks good. Unless you like a more loose pom pom, of course.
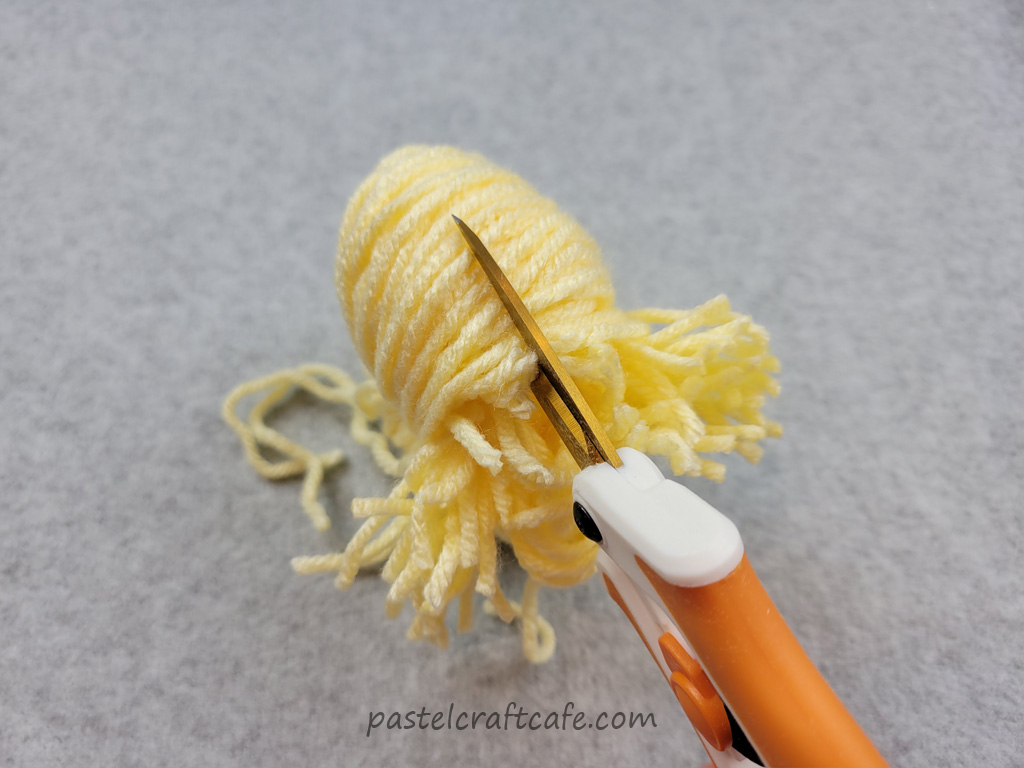
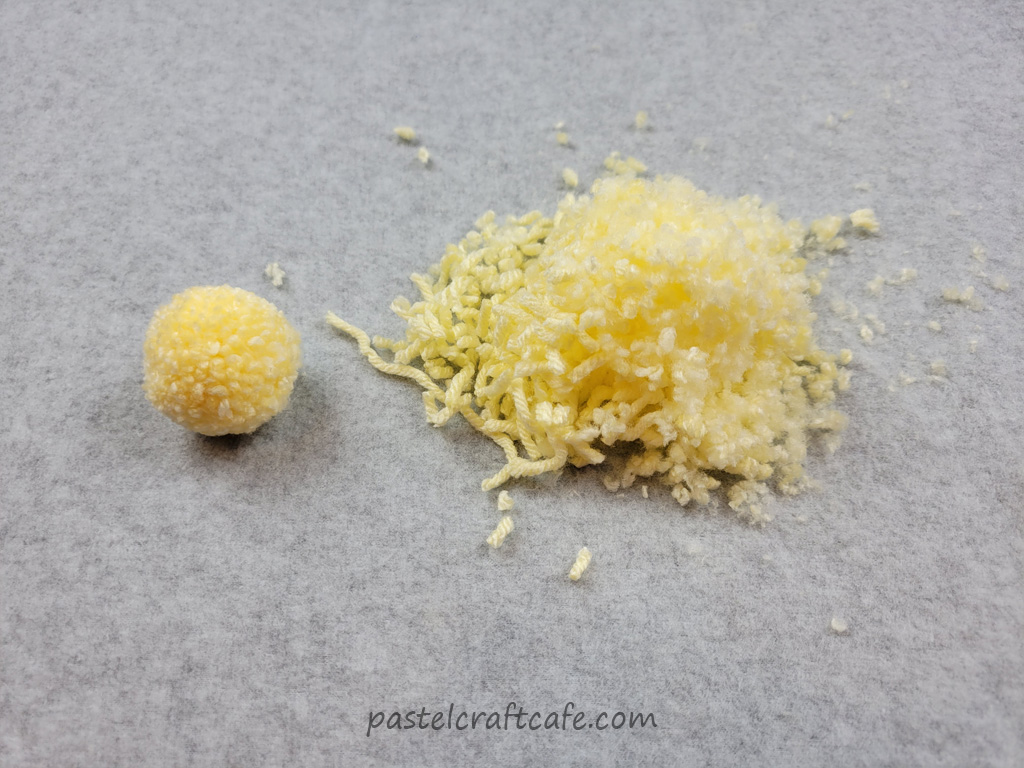
Step 6: Trim and Shape Finger Pom Poms
Lastly, use your scissors to trim down your pom pom and shape it into a smoother ball shape. Be prepared to cut away a lot of yarn until it starts to look good. In the end, your pile of yarn fuzzies will be a good deal larger than your finished pom pom. I like to keep a lint roller handy for easy clean up.
The two finger pom pom isn’t so bad. Just a small pile of fuzz.

The three finger pom pom makes a good bit more of a pile.
And not surprisingly, the four finger pom pom has the biggest pile of yarn fuzz after trimming.

Here’s what all three finished finger pom poms look like side by side. They are very similar in size, but with just enough variation that they could cover a good range of different crafts.

Final Thoughts
Although I prefer using my Clover Pom Pom Makers when it comes to making pom poms, this method works very well. The biggest downside is that you need to trim the pom poms down a lot more than in some other methods, which means more yarn that will be thrown out.
But the fact that you don’t need to buy or make any special tools make this a very worthwhile method of making pom poms. It’s also nice that you have three different size options, which open the door for more possibilities depending on what you’re planning on using these pom poms for.
I hope that you enjoyed this tutorial and found it helpful. If you have any questions or comments, please feel free to leave them below. I’d love to hear from you! Thank you for stopping by and happy crafting!
