
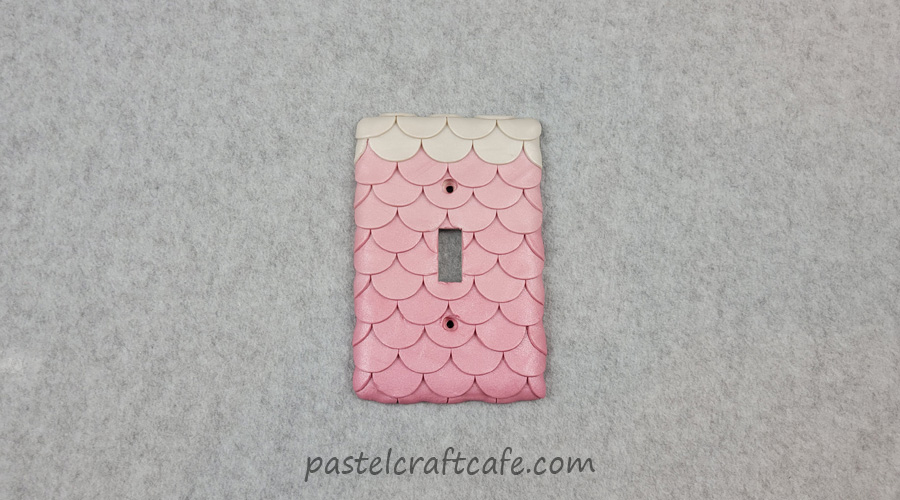
Add a touch of fantasy to any room with this mermaid scale light switch cover. It’s a perfect addition to any mermaid lover’s room.
I love just about anything mermaid related. It’s one of the things from my childhood that I never grew out of. In just about every room of my house you can find at least one mermaid related decor item.
So I thought it was about time to add some mermaid themed crafts to this blog. I have a handful of ideas for projects I want to do in the future. But for now I’m going to start with this light switch cover decorated to look like mermaid scales.
Although I had mermaids in mind when I made this, the pattern could also easily be dragon scales as well. Or any other scaled creature for that matter. I simply decided on mermaids because of the light and pearlescent clay I used to make this light switch cover.
This project does take a bit of time, so this may be a better one to do when you have a few hours to spare. But the end result more than makes up for the time spent. I ended up displaying the one from this tutorial in my craft room. The plain and boring light switch cover I had in there needed an upgrade anyway.

What You Will Need to Make a Mermaid Scale Light Switch Cover
Note: This post may contain affiliate links, which means that if you click on a link and make a purchase, I may earn a small commission at no extra cost to you. For more information, please see my Disclosure.
Polymer Clay (I used Sculpey III in the colors Pearl and Princess Pearl)

I am using two different colors of clay because I wanted to mix them together. If you are only planning on using one color of clay, then one 2 oz block will be enough to cover most single switch plates.
During this project, I also used a silicone baking mat to protect my work surface. Depending on where you’re working this isn’t essential. But I thought it was especially helpful when it came time to transfer the clay to my light switch plate. You don’t need any special mat, any nonstick sheet should work just as well, like wax paper.
What Kind of Switch Plate Do You Need for this Project?
Because the scales are made of polymer clay, they need to be baked in an oven to harden them. Therefore, the switch plate needs to stand up to whatever heat the clay is baked at. I’m using Sculpey III, which bakes at 275 degrees for 15 minutes. Most other polymer clays bake at similar times and temperatures.
Many light switch covers are made of plastic, so I wanted to test a couple before doing my final project to see if they would hold up. I tried two different ones, one made of thermoset plastic and one made of polycarbonate. Both held up just fine, with the polycarbonate one only developing the slightest dip in the middle after baking that is practically unnoticeable.
As a bonus, the clay also sticks to both plates very well after baking. So there is no need to do any special prep work on the plates beforehand. I did give them a quick wash with a bit of soap to make sure there was no residue on the plates, but other than that did nothing else.
How to Make a Mermaid Scale Light switch Cover
Step 1: Prepare Clay
If you are only using one color for the scales, the only preparation you need to do is knead the clay a bit to soften it up for rolling it out. But if you want to do any special effects or mixing, you would do this now.
If you saw my previous project where I dip dyed terra cotta pots, you’d know that I’m a sucker for ombre. And I thought it would look really neat to gradually blend the pink and white color together for this craft as well.
To do this I divided my clay into five different sections. The first was all pearl white, followed by three parts white to one part pink. Next is half pink and half white, then three parts pink to one part white. And finally the last section is just pink. That way it would be an even and gradual shift from one color to the other.

After mixing them all together, the plain white one stands out a bit more than the rest. But I’m still happy with how the colors look.

Step 2: Roll Clay
With the colors mixed, it’s time to roll them out into sheets. I find the easiest way to do this is to use a clay roller with a hand crank. If you’ve ever used a pasta roller, it’s basically the same thing. It’s also fine to use a clay rolling pin or anything else that can roll the clay out into a flat sheet. I prefer the clay roller because it makes it pretty much effortless to get the clay rolled out to the same thickness.
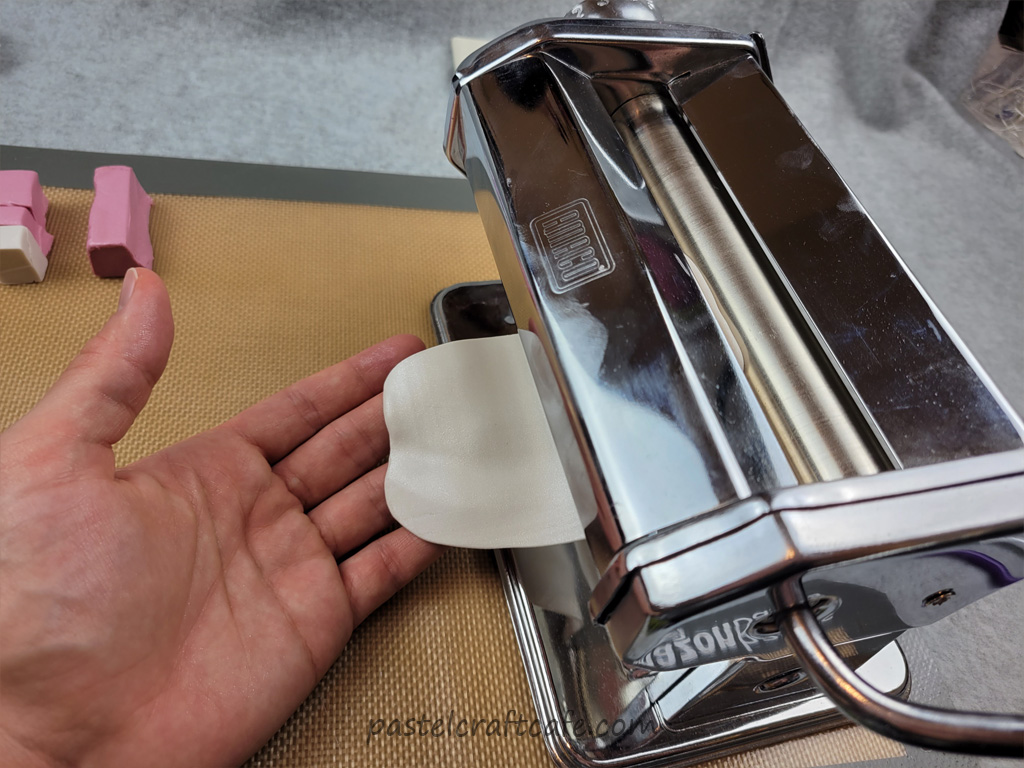
Decide what thickness you want your scales to be and roll out the clay. I recommend making it fairly thin so the scales will layer better. But you also don’t want it too thin or else it will be harder to work with. For reference if you happen to be using a pasta-type roller like I am, I have it set to a 3. I’m not sure if that thickness varies between different brands, though, so you may still need to do some experimenting.
Step 3: Cut Clay Circles
Next cut your clay into circles. I’m using one from a set of fondant cutters that is about 7/8“ wide. It was the smallest cutter in the set and I found it to be the perfect size for this project.

If you need more circles after cutting your clay, roll it out again and keep cutting until you have as many as you need. Then move onto your next color (if you’re using multiple colors, that is) until all the circles have been cut.
The number of circles you will need will be determined by a few things. Mainly, the size of your light switch cover and the size of your circles. The one I’m using is 3 1/8” wide and 4 7/8” tall. In total I needed between 13 and 15 of each color. So to be safe I just cut 15 circles of each color.

Step 4: Arrange Circles in Scale Pattern
Now it’s time to turn all these circles into scales. If you want you can place them directly onto the light switch cover. But I prefer to arrange them how I like on a separate surface first. I think that it’s easier to make things look even when done that way.
Because of the size of my circles compared to my light switch cover, each row fit either 4 or 5 circles. And in total I needed 15 rows of circles to completely cover everything.
Start off with your first row. In order to make the scale pattern, you will need to start from the bottom and work your way to the top. So for mine that means starting with the darkest pink color.
Line up the circles on your first row as evenly as possible. The mat I used happened to have a border on it, so I used that to line them up. Because this is my first row, I used the largest amount of circles I would need, which in my case is five.

Then start on the next row. Place each circle in between the circles on the row below. This time I only need four circles.

Continue adding rows of circles until you have enough to completely cover your light switch cover. For me this ended up being 15 total rows. That means I did three rows of each color clay I mixed.

If you plan on using multiple colors like me and want them to be an even number of rows, you may want to make a quick practice layer with some scrap clay. If you are using a different size light switch plate or circles as I did, the amount of circles and rows you will need can vary drastically.
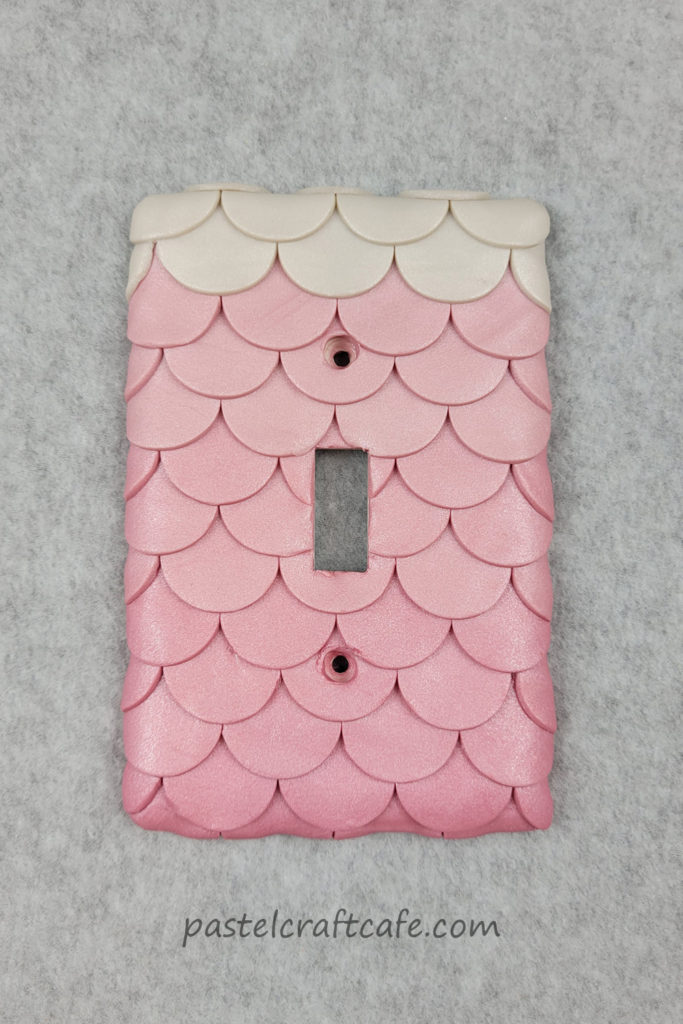
Step 5: Attach Scales to Light Switch and Cut Holes
Next you need to transfer your layer of clay scales onto the light switch cover. Lightly pat down the scales to make sure they are stuck to one another. Just don’t press too hard. You don’t want to leave any fingerprints or dents on the clay. And you also want your pattern to have some dimension to it.
I also did one last check to make sure I would have enough clay to completely cover the light switch plate.

Then gently peel your scales off your work surface. This is where having a separate sheet to work with the clay came in handy. I lifted the sheet and was able to bend it near the scales to make it easier to pull them off. Just take things slow so nothing falls apart.
Now line up your clay where you want it to go on the light switch cover. From here, gently fold the clay over the edges. I had several scales that started to separate once I bent the clay. So just do your best to keep everything together and work slowly and carefully.
Take your X-acto knife and start to cut away the clay around the edges. Once that is done, cut out the clay from the holes in the light switch cover where the light switch and screws will go. Make sure to really cut the sides and light switch hole as flush against the plate as possible. For the screw holes, I used the actual screws and pressed them into the clay all the way. That would ensure that later when I attached the plate to the wall, there wouldn’t be any clay in the way of the screws.

Step 6: Bake Mermaid Scale Light Switch Cover
Now it’s finally time to bake this cover and harden the clay. Carefully transfer your light switch cover onto a baking sheet lined with parchment paper or something similar. Then when your oven is preheated to the proper temperature, pop it in.
Depending on the brand of clay, the time and temperature you need the oven to be will vary a bit. I used the brand Sculpey III, so I baked mine at 275 degrees for 15 minutes.
If at all possible, I would also suggest baking this outside or in some other well-ventilated area. The plastic polycarbonate light switch cover I used held up very well in the oven, but still had a tiny bit of a plastic-y smell while it baked. I doubt the fumes would be harmful, especially if you are only baking one cover. But I’m fairly sensitive to smells so I like to take any safety precautions I can.
In my case I took my toaster oven out onto my patio to do the baking. If this isn’t an option for you, I would open a window or run a fan for some extra air circulation.
Once the light switch plate has finished baking, remove it from the oven and let it completely cool.
At this point, if you wanted a glossy finish you could also add a coat or two of varnish on top of the clay. Because I picked two pearlescent colors I thought the sparkle from that was enough. So I opted to skip any sort of glaze or varnish this time.
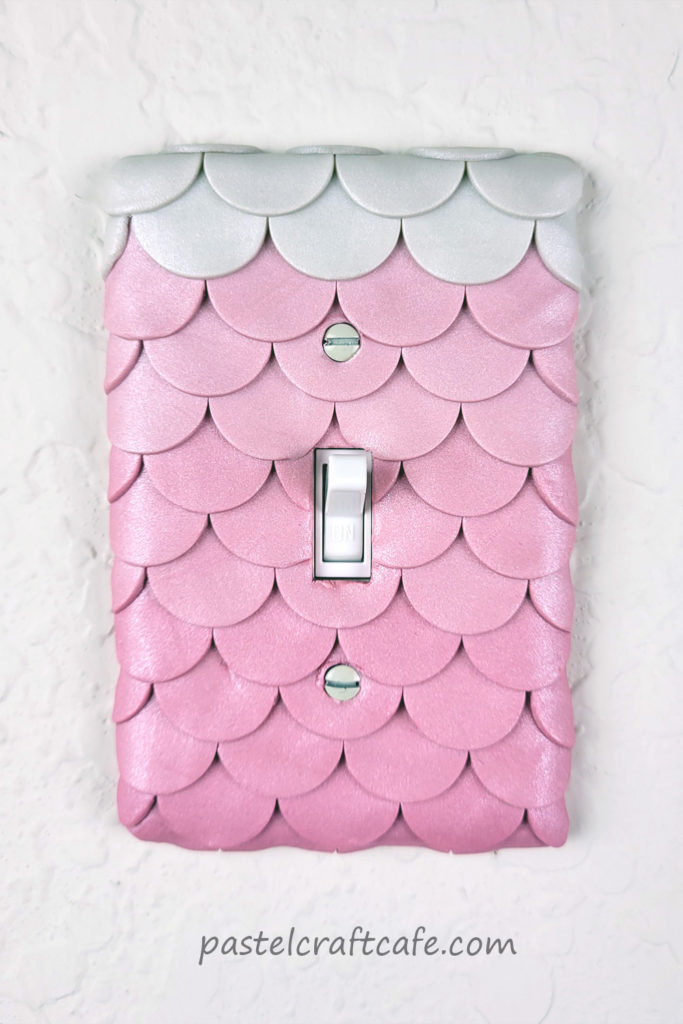
Step 7: Attach Mermaid Scale Light Switch Cover to Wall
The only thing left to do now is attach the mermaid scale light switch cover to a light switch. Because I had taken a lot of care to cut the clay away from the holes and edges, I didn’t have any issues with installing it. The cover fit flush against the wall and the screws were able to be tightened all the way.
If by chance you didn’t cut the clay all the way away, you should be able to sand down any stray clay with a bit of sandpaper. A nail file would also probably do the trick.
Then sit back and admire your new room accessory!
Additional Notes on Mermaid Light Switch Cover
One thing I love about projects with these scalloped scales is the versatility. Depending on the colors and/or patterns you use for your scales it can represent all kinds of different creatures. From fantasy mermaids and dragons to realistic reptiles or fish, there are so many possibilities.
The project ended up being a bit more time consuming that I originally anticipated. But part of that was because I am a huge perfectionist. I wanted to make the rows of scales as perfectly even as possible so I spent a lot of my time carefully lining them up.
It had been quite a while since I last worked with clay, so I’m very glad that everything worked out well. And besides wanting to try some different color combinations, there isn’t anything that I would change if I happened to do this craft again. That’s something that I wish could happen a bit more often!
I hope that you enjoyed this tutorial and found it helpful. If you have any questions or comments, please feel free to leave them below. I’d love to hear from you! Thank you for stopping by and happy crafting!

If you liked this tutorial, don’t forget to pin it for later on Pinterest!
